Showing posts with label projects. Show all posts

Friday, August 3, 2012

Building Crown Ledges

I am so excited for today's post!  For my very first time, I teamed up with the amazing Ana White to bring you this.  I came across her blog over two years ago when I wanted to buy a bench that was outside of my price point, and found her plans to build one instead.  She is one of my favorite blogs and virtual people to keep up with, and is so so talented.  It's such an honor to work with her!  

As most of the things I build start, I saw this :
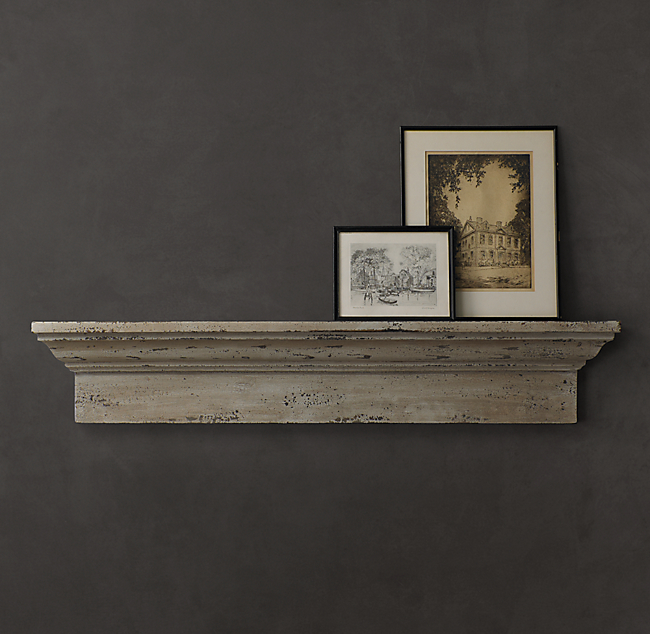
Image Courtesy of Restoration Hardware
And wanted two of the large ones for above the entire length of Kalia's chalk wall.  Except I wanted the finish to be a little bit brighter, more appropriate for a fun playroom...and by no means did I want to pay the $225 plus tax and shipping per ledge for their 75" ones.

I think I told Chris about 100 times that we could build these before he bought into it with me using scrap pieces we had lying around to do a mach up version of these.  They are seriously so simple to make.

Lucky for you, Ana White drew up an amazing how to, so you don't have to follow my scrap board pieces to buld this for yourself.  Just hop over to her site and follow the simple directions!

The ledge is essentially two 1x5's and a piece of crown molding between the two.  We used a 1x4 for the top and a 1x5 for the bottom piece...


...and then used a nail gun to put the crown molding piece in between.


Because our ledges go all the way across the wall, we only had to worry about finishing one out of the four ends of our ledges...which was the only sort of tricky part with this whole project.


For the full tutorial, check out here : Ana White Building Crown Ledges .

After both ledges were put together,


I primed it all and then gave it a few good sandings with my 150 grit sandpaper, followed by a final coat of the 200 grit sandpaper, until the entire thing felt really smooth.


After that, I painted my base coat of turquoise on.  I used left over paint that I had from my sewing cabinet makeover I did awhile back.


I know, entirely too bright, but I expected that!  Like I said, this was my base coat.  Two notes about this...

1.  That orange container you see there is a big thing of Floetrol.  For painting things, it is my best friend.  Especially in this extremely high Florida humidity.  It basically acts as a conditioner for latex paints.  It extends out the drying time and makes it a whole lot easier to eliminate brush strokes.

2.  I almost always do a test run on pieces to see if I can get the desired outcome before just jumping on board with painting the entire thing when they're this big.  I took scraps and painted about a million different color and finishing combinations until I came up with one I liked.  Much easier than being frustrated at the end with all of the hard work you do on a large piece!

After I put the base coat on, I took some leftover gel stain I had (Minwax's Red Mahogony) and spread it generously on top.


My goofy hubs took that picture and then decided that I looked creepy with no head, so he needed a head shot too.  Maybe I was supposed to photoshop these two pictures together, but I don't know how to use photoshop, so you just get the picture.


I wiped off the excess gel stain until I got to a color combo I liked.  There was a minor freak out moment here where I couldn't get the gel stain off quick enough and I thought I ruined the entire thing and was going to have to sand it all down and start from scratch.  Chris (goofy hubs!) came to the rescue and told me to just wipe it down with paint thinner.  That was actually a brilliant move.  I just added a little bit of paint thinner to my rag and went up and down until I got the ledges just right finish wise.  Then I sanded down the edges a bit and added a few coats of polycrylic, and viola!


We added j hooks to the back and mounted both ledges side by side.


Details shots :


Here's our finished ledges at Kalia's birthday party (thanks E for taking these pictures!) :


The total cost of this for both ledges was $100.  That sure beats getting two of RH's ledges for $500 + once you add in tax and shipping, and my ledges are two feet bigger!

So what do you think of them?  We really love how this room is coming together.  It's a really fun bright space!

I'm actually going to do something a little different with pictures on the ledge, I'll have to share what I wind up with at the end.  This was so fun to put together, to reflect back on some of our favorite memories with our little girl.  Where oh where did the last year go?!?!

Hope everyone has a wonderful weekend.  We just got back from a 2+ week family vacation, so I'm really behind in posts.  Hopefully I can catch up with some things this weekend and be back on track.  Happy Friday!


If you enjoyed this post, please leave a comment or subscribe to the feed reader to get future posts delivered to your reader.


I'm linking up to the parties in my sidebar - go check them out!

Wednesday, June 27, 2012

I'm an idiot and a chalk wall

This past weekend we went on a cleaning spree.  Kalia had been sick pretty much since her first birthday party (her one year check up was that Monday - I'm pretty sure she caught it there - darn not first thing in the morning appointments!), so once she started sort of being on the up and up, I felt the need to sanitize everything.  And I do mean everything.  Like 3300 + square feet of everything.

Yeah, I know, still doesn't explain why I'm an idiot...I'm getting there.

We started in the living room and conditioned the leather, dusted every single surface and every single thing on the surface, cleaned the fans, the baseboards, you name it, it got cleaned.  Then we moved onto the kitchen and Chris even took everything out of our pantry and cleaned and re-organized it.  So Saturday was busy busy busy with taking turns playing with Kalia and cleaning, cleaning, cleaning.  It was past 11 when we deemed the house done enough for the night and headed to bed.  Kalia wakes up at 530 a.m.(oiy!).

Sunday we started on the cleaning kick again (I know, we're totally the life of the party these days), and I think all of the cleaning chemicals and sheer exhaustion must have gotten to my brain by the time Kalia woke up from her first nap.

We took down the balloons we used as decor for Kalia's birthday party the night before (decorations post coming soon, promise) and decided to leave them in Kalia's playroom for a few days because she has a thing for balloons.  Apparently so do we.

When she woke up, we all went in the the playroom to have some family playtime (we try to make sure we both play with her at least once a day on the weekends instead of constantly trading off).  Chris decided a fun game would be to spike the balloons off of Kalia's head.  Kalia could have cared less.  Me, on the other hand, took issue (playfully!) with him spiking balloons off of my little girls head, so I decided I would spike the balloons of off his head for Kalia.

Chris, also, could have cared less.

I guess I thought I'd really show him if I spiked it closer and harder.

A balloon.

Really??

So I tossed my balloon up, and impatiently waited for it to float itself back down so I could spike it as hard as I could into the back of Chris's head.  I swung through the balloon as hard as I could and in my follow through (because now I was entirely too close), I hit my middle finger on the back of Chris's shoulder.

Snap.

Such.an.idiot.

The conversation from there went something like this :

Chris : "Ow Kara, that really hurt my shoulder!"

Me : "FFF!!!!"

Kalia : "Baa!  Baa!! BAAAA!!!!"  (Everything she's happy at is either ba or da)
Chris : "What'd you hit me with??"
Me : (Hunched over holding me hand) "Ow, ow, ow, ow, ow!!!!!"
Kalia : "BAAAAA!!!!!!"
Chris : "Seriously, what'd you hit me with??"
Me : "My . middle . finger.  I'm.pretty.sure.it's.broken.  Ow, ow, ow."
Chris: "Are you serious??"  takes a look at it.  "Yep, you're serious.  That sucks.  Guess my shoulder doesn't hurt so bad anymore.  How do you do these things Kara???"

Kalia : "BAAAAA!!!!!!  BAAAAA!!!"


Seriously, I am such an idiot.  The sad thing is it is typical me.  I build stuff, move trees, and think I have He-man strength when it comes to most anything, but I can't even spike a freaking balloon without breaking something.

Anyways, the point in writing that is that if I have typos, ignore them (I'm trying to type sans middle finger), and I'm behind on my posts because it takes forever to type them.  Please forgive me for lack of responses on my comments as well, I'm getting there!

Whew...that took forever.  Now, onto less idiotic things...like a chalk wall!

That's right, my walls can talk!  Well, I guess they can't talk per say, but you can read them now!  I've wanted to do a chalk wall somewhere in the house for a long long time.  I told Chris before we were even pregnant that when we had babies, one of the walls was becoming chalk.  He said no, but eventually I broke him down (some tasks take longer to break his disapproval of than others).

The large wall with nothing on it in Kalia's playroom screamed "pick me, pick me!!!" for a chalk wall.  And I listened.

Yeah, those cleaning chemicals are still getting to me...

I'm not gonna lie, painting that huge wall that you see when you first walk into our house black, was daunting.  But, like I said, the wall told me to paint it, so what am I supposed to do?  Ignore crazy talking walls?  No way, not this gal.

I'm losing it, I know.  Must.sleep.

We sanded prior to painting.  If I had to do this over again, I'd sand more thoroughly.  It's hard not to rush through projects with a wee one in tow, but chalkboards are supposed to be like butter, and ours is a little more cottage cheese like.  Still fun, and still totally function able, but for those of you that haven't gotten on the chalk wall train and plan on it, sand, sand, sand!


You can see the original color the previous owners had this room.  Lavendar.  With a pink pool deck.  I have no idea what they were thinking.  Moving on...


I painted three coats of the chalkboard paint on.


The paint looked super streaky, but wound up drying just fine.

After all the coats were dry, I primed / conditioned the wall.  Holy foreverness.  I was kind of dumb (theme of this post I think), and used a tiny thin piece of chalk to do this.  Well, like three of them by the time I was done.  I smartened up for Kalia's birthday party and bought big fat chalk, but I initially only bought the skinny white dustless chalk.  They really should call it less dust chalk instead of dustless.  Chalk is dust.  It doesn't give off as much dust as the big fat ones do, but it still creates dust, so don't let it fool you!


I attempted to erase the entire 16' wall with a tiny tiny felt eraser.  Dumb, dumb, dumb.  Again.  Holy foreverness, again.  At that point I was feeling a little silly, and sent Chris this picture:


Minus taking forever, the felt eraser didn't really erase it so well either.


At this point, I think Chris was majorly regretting letting me wear him down over the chalk wall.  But after going back over it with a thin dust towel that is now our official eraser for the wall, we were both really happy with the outcome.


I didn't leave the crooked paint line as our finish for the top of the chalk wall, but I can't show you in this post what I finished it off with.  My finger hurts too badly, and this post is long enough!

The kids had fun drawing on the chalk wall at Kalia's birthday party, and Kalia and I have had fun on it since then.  Or maybe I've had fun and Kalia's had fun eating chalk.  I know, the poor girl doesn't stand a chance. Sigh...

But she'll have fun on it soon enough!  Has anybody tried those chalk ink pens on chalk walls?  I'm really curious to know how those work and if they erase well or leave etchings behind.  Let me know if you've tried it out!

So what do you think?  Well, besides I'm an idiot ... I mean of our new chalk wall, not of me!  (Dear all of my lovely family members, no comments necessary on the idiot front!!)  This was one of those projects that wasn't exactly for her birthday party, but I wanted to have done before the big day arrived.

Hope everyone is having a great week!  Happy Hump Day!

If you enjoyed this post, please leave a comment or subscribe to the feed reader to get future posts delivered to your reader.


I'm linking up to the parties on my sidebar, go checkout what everyone else is up to for great inspiration! 

Friday, June 22, 2012

Kalia's First Birthday Party : Chalk Signs

I showed you the fabric heart I did yesterday.  I mentioned that my vision for the fabric heart was to use it as a photo booth.

I not only wanted to capture pictures of the guests, but I also wanted them to be able to write messages to Kalia as well.  It'll be a lot of fun to look back at these years down the road.  So next up on the project list was chalk signs!

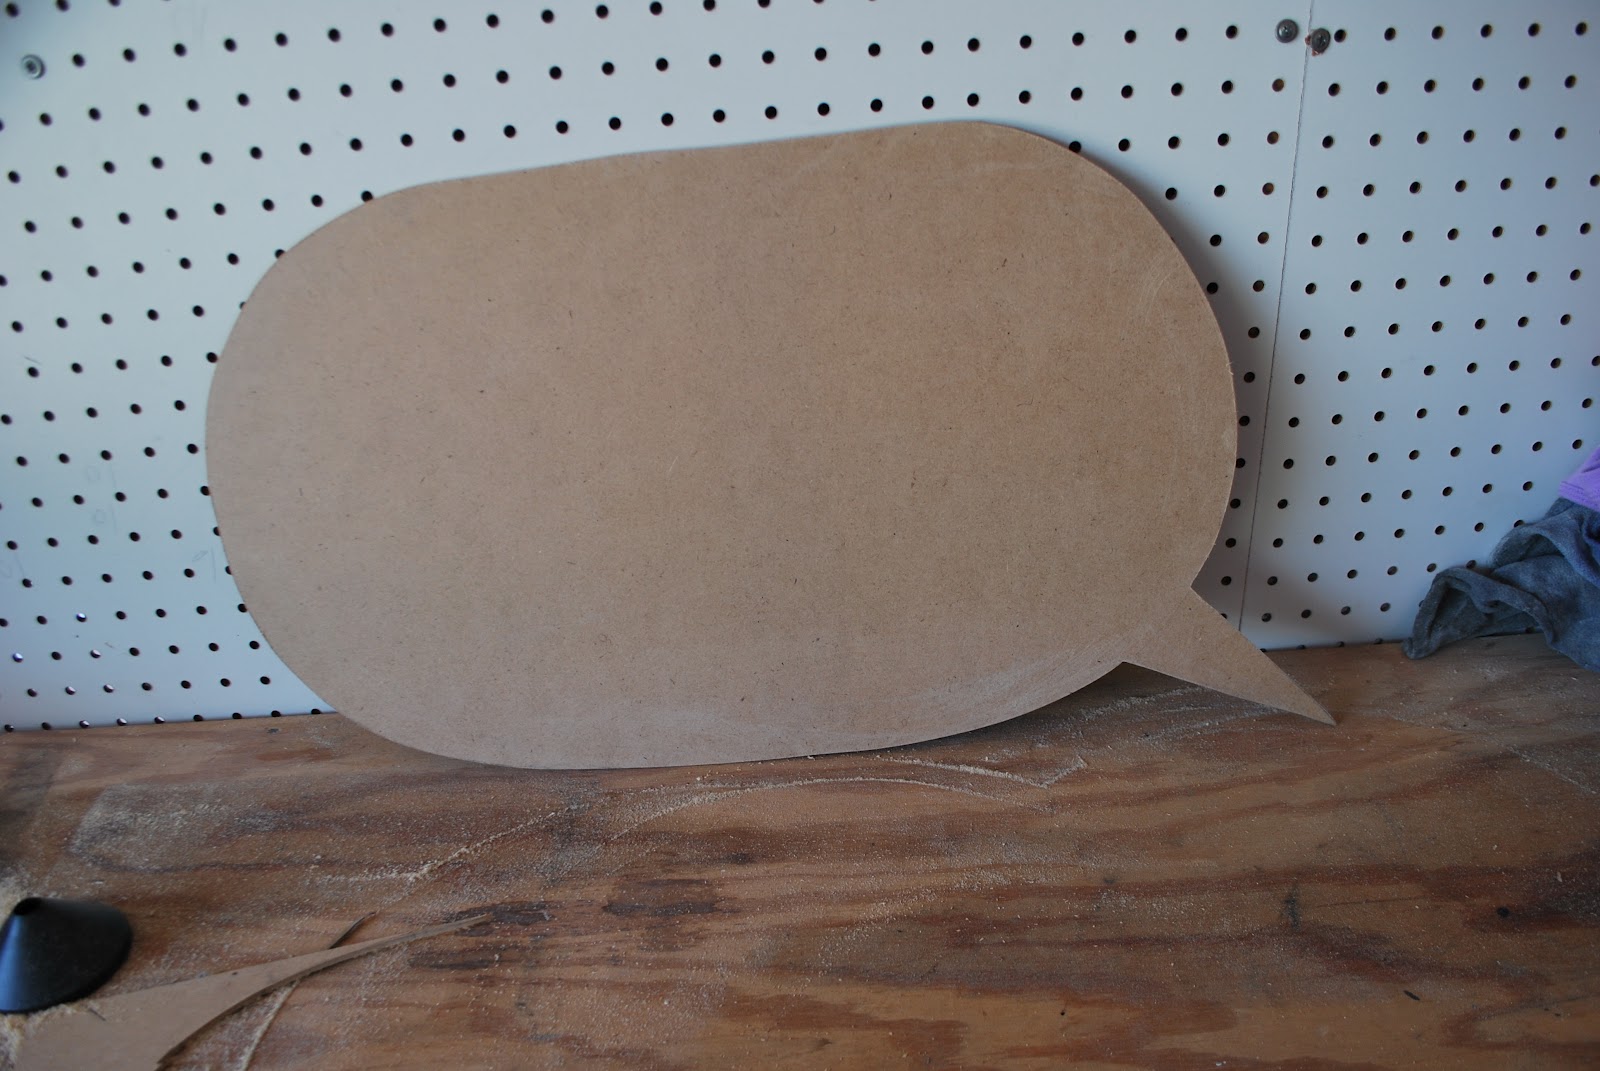
Lucky me, we had an old dresser that had seen much better days and was on it's way out to the street.  We pulled out the drawers to take some of the weight off, and a lightbulb went of in my head.  (Yes Dad, that happens every now and then).  I needed thin wood to make my chalkboard signs for the party, and the bottom of the dresser was made with thin wood.  Score!!

I took apart the dressers and drew out my various shapes onto the wood.


And then got to cutting with my jig saw.


After I cut out all of my shapes...


(no in process pictures from here on, sorry!  naptimes were flying by!), I did two layers of chalk paint over each of them.

My sister in law has a whole lot prettier hand writing, so she wrote a message for the guests instructing them what to do with the chalk signs and the photo wall.


We left out some chalk, and left my point and shoot camera sitting on the table.


I taped balloons to the ceiling so that the photo wall felt more secluded, and then added curling ribbon to the bottoms of the balloons.  So much cheaper than using helium balloons! I added the accordion scrap paper things in the background after doing some test shots and deciding the wall was missing something.  The guests did the rest.


I cut out one of the signs to look like a stop sign and hung it from Kalia's playroom with rules on it.  We've had some not fun experiences with those mats and food and shoes!


I also used a sign to tell guests where to leave the gifts.  I'll show the full decor later, but for now, here's a cropped shot of the gifts sign :


So what do you think of my photo wall?  We had fun with it, and I know those pictures will be so fun to look back at one day!

While I'm on the topic of pictures, thanks so much to Erin and Chris for gifting Kalia with photographing her first Birthday party.  They take such great pictures, and did an amazing job capturing all of the details and moments so Chris and I could just enjoy the celebration!

Hope everyone has a great weekend!  More Birthday posts coming soon!

If you enjoyed this post, please leave a comment or subscribe to the feed reader to get future posts delivered to your reader.

Thursday, June 21, 2012

Kalia's First Birthday Party : Fabric Heart

I have about a million posts to write on everything I did for Kalia's First Birthday Party.  I kept the decor pretty inexpensive, more work on my part than actual cost.

I'm not really good on 'themes' with parties.  For a baby shower I was helping throw, one of the girls asked what kind of theme we wanted to go with (I was in charge of decorations) and I said "baby".  When they said, yeah, but what kind of baby theme, I replied with "baby girl."  For my own wedding, when the florist asked what kind of flowers I wanted, I said "pretty ones".  When it comes to parties / events, I'm not really big into themes, I just want everything to mean something and look cool.  Does that count as a theme??

But for Kalia's invites I sent out, I used pictures, so I guess that was sort of my theme.  I decided to mimic her nursery colors of both blue and pink as well, and went forward with a game plan from there.  I am a little crazy about pictures...especially of Kalia.  I have always loved capturing moments, so I decided to incorporate some of that into the party decor / events as well.

I've seen photo booths used at events before, so I wanted to recreate something like that, but a lot less pricey, and something relating back to Kalia.  So here's what I did :

I picked up a large piece of clearance fabric, and had Chris hold it up where I wanted it to go to make sure the empty wall I was putting it on didn't dwarf the fabric.


Then I drew a large heart in chalk on the fabric.


I used Kalia's ottoman from her nursery to trace the circular parts of the heart, and then a ruler to draw the straight part.

After that, I took a pink and a blue paint pen and got to writing Kalia's name.  Over.and over.and over again.  I sort of felt like I was in elementary school and had gotten in trouble and had to write my name on the chalk board about a million times.


In all honesty, it took me probably about 15 minutes to write it out.  It just seemed like a lot longer than that!


The fabric needed a large frame to go in, and there is no way I'm dishing out the cash for one of those, so I made one.  I wanted the frame to have a little more detail than my normal picture frames, so I whipped out my router tool for the first time.  That thing is amazing.  So easy and so fun to use!  Here's an in action shot :


and here's what the wood looked like afterwards.


I initially glazed the frame to bring out my routing detail, but the glaze just didn't go with Kalia's fabric heart, so I nixed that.  After I nailed the large frame together, I gave her a few coats of white spray paint.


From there, I just stapled the fabric to the back of the frame.  I can't decide if I want to reuse the frame for something else, so I didn't put too many staples in it.  In hindsight, I should have either glued the fabric around it and cut it off, or just gotten over it and put enough staples to pull it tight.  The fabric wrinkled a bit more than I would have liked.  Overall though, I was still happy with the final product.


Besides this being the photo wall, we also did Kalia's smash cake using this as the back drop.


Kalia wasn't sure what to think of the 40 people singing Happy Birthday to her!  I'll have more in action shots of the photo wall coming up shortly, so stay tuned for that.

Hope everyone's had a great week so far!


If you enjoyed this post, please leave a comment or subscribe to the feed reader to get future posts delivered to your reader.

Thursday, May 3, 2012

Goodbye Dirt Patch, Hello Sod!

We finally have grass in our backyard!!  Woot!

We've been waiting to run into Ahmed Hassan of Yard Crashers at our local Home Improvement stores that we frequently visit, but finally decided after three years, that's probably just not going to happen.  Now that Kalia is here, and her and I love spending time outdoors, that got moved to the top of the to-do list for this summer.  We decided to section out the project because our backyard is pretty big.  I didn't get a before picture, but our backyard is pretty much all the same.  This is the section that we're waiting to redo.  Kodi wanted to say hi and he missed you guys too!  Do you see all of the weeds and dead sections?  Ugh!


First up Chris sprayed round up all over the section we decided to sod to kill all of the existing weeds and little bit of grass that was there.  After we let that sit for the better part of a week, I took the metal rake out there and raked and raked and raked during Kalia's naptimes.  I got about 80% done with it all before Chris came out after work one day to help me out.  He said he didn't know how I didn't make him rent a plow to pull it all up.  It was such hard back breaking work.  It was actually the hardest part though, so thankfully, everything got easier from there.

I might have told Chris that the success of our marriage depending on nightly massages while all of this was going on.  :-)


Chris rented a tiller from Home Depot and tilled up the dirt and few remaining stubborn areas of dead grass/weeds that we couldn't get to come up.


That part was actually easier than I thought it would be.  We rented it for 4 hours, and had it back in plenty of time.  The only problem with the tiller was that he hit the sprinkler pipe in a few places and had to patch some holes.  But after he patched that up, he laid fertilizer, weed killer, and bug killer on our fresh dirt to give the sod a good base to stick to.  Next up, we were ready for sod!

We had the sod guys deliver three pallets of sod on Tuesday of last week.  They didn't show up until after 6, so  we didn't get to start on laying the sod until 730 - after we fed Kalia, ate dinner, and put her down for the night.


Chris removed the fence panels and had the delivery truck just take the sod straight to where we were laying it.  My back loves that man!  So smart!

I have no idea how most people do this, but when we get to an edge or around a tree, we our big tree pruners to cut the sod.


And then we just push it down.  So simple!


We managed to get two pallets laid before it got too dark and we had to call it quits.  Chris rigged our dolly with a piece of plywood across the bottom and we loaded up all of the sod onto the dolly, rolled that over to where we were laying, and just emptied from there.  Again, my back loves that man!  Here's what it looked like before we went to bed (and a picture of Chris's dolly rig):


On Wednesday morning we got up and laid the last pallet of sod before Chris hurried off to work.  Kalia woke up well before the sun rose that day, which was only good because it meant she went back down for her first nap as the sun was rising.  Let me tell ya though, we were not so chipper laying down that 3rd pallet as we were for the first two!  But man, is insta-lawn (that's what I call pallets of sod vs. seeding or plugging!) so nice!


After we got the third pallet laid, we realized that we overkilled / underestimated how much sod we'd need.  I told Chris I wanted to leave a small dirt border around the sod so that we could keep the new stuff away from the weeds and such, but this was a little bit much.  Especially with a Kodi and a Kalia!


So Chris headed down to the sod place (they'll only deliver 2 + pallets for free) and had them put 500 sq feet of sod into his truck.  That thing was weighed down!


After laying that the night before we had to leave for my sisters wedding, we decided that the next big section of the yard isn't getting done until the Fall.  We're actually going to put another 1/2 pallet back here, because we still have more dirt than we'd like with Kodi and Kalia.  We need to resod the sidewalk part of our front yard anyways, so we'll just over load Chris's truck and do them both at the same time shortly.


After all our hard work, here's what our new back yard looks like today :


So much nicer!!  Kalia and I have already thoroughly enjoyed it this week too.  We borrowed one of those big sprinkler things to get a patch wet that looked like the sprinklers weren't hitting, and her and I had a grand 'ol time running through the sprinklers.  Ahhh, to be a kid again.  Life is good!


Hope everyone is having a great week so far!

If you enjoyed this post, please leave a comment or subscribe to the feed reader to get future posts delivered to your reader.
Related Posts with Thumbnails