Showing posts with label bookshelves. Show all posts

Monday, July 29, 2013

Texas House : Kalia's Nursery Suite

For many of you, Kalia's nursery was what brought you over to my blog in the first place.  Here it is at our last house :


And here's what it started with there :


Yeah, about a million times better.  Maybe 2 million.  We did so many DIY projects in there, it was definitely a labor of love.

Kalia hasn't adjusted so well to the move.  We were in an apartment for a month, which was so confusing to her.  She's at that awkward age where she remembers stuff, knows what she wants, but can't exactly express it or her emotions that she's feeling.  The first time she talked to any other little kid since the first week of us being here was the 4th of July.  She still won't talk to adults.

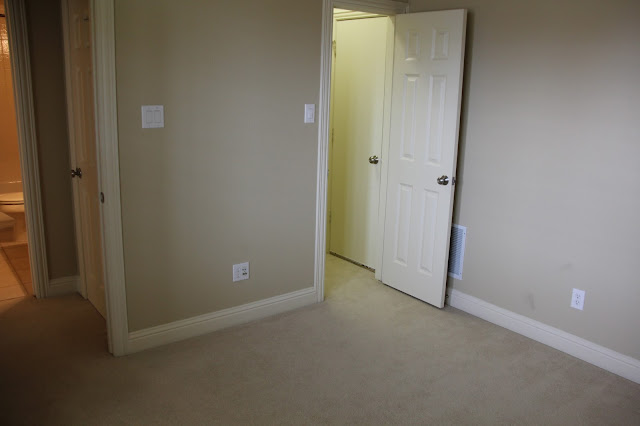
So, we knew it was so important to get her room set up just the way it was before asap.  We were so so thankful that my MIL came to help out with the move.  It allowed us to paint Kalia's room prior to the movers showing up with our stuff (walls moonshine by benjamin moore and closet lucerne by benjamin moore), and on day 2 of living there, get everything on the walls the exact way it was before.  Here's what we started with.  Much better than the above before picture!


And here's what it looks like when you walk in :


I did say previously that those bookshelves would stay if we ever left our Florida house.  I never really thought we'd leave when I said that though.  They came with us.


The wall here is a little bit smaller so we had to cut them down by about 8 inches.  I think they're my most favorite thing still.


The ABC wall is Kalia's favorite.  She asked for it nonstop when we were in the apartment.  When we moved here that was the first thing she asked for "ABC's on the wall!!!".  Chris didn't really want to put 26 more holes in the wall, but Kalia and I outnumber him!


Here is the view from Kalia's closet on the other side of the room.


I realize the curtains look like high-waters.  They work for now, and I really do love the curtains, just wish they were longer.  I'll probably sew something on there when they start to bother me too much.  When she's ready for her big girl bed, one of the daybeds will go where the dresser is, and the dresser will move to the other wall.  I still don't love the cream trim, and all of my accents are white though.  If I win the lottery I'll pay someone to paint all of the doors, shutters, and trim white.  Gotta get on playing first!


We built the bookshelves, dresser, and the K with my maternity pictures of Kalia on there. All of that is linked up in Kalia's initial nursery tour here.

Here's the view to the left of the crib.


You can see the picture frame with fabric and mini clothes pins I did for her before she was born.  I want to hang them closer together, they bug me as is.  We spaced them a little bit too far apart.


Kalia's closet was "prettier" at the last house, but she's got more room with it here.  She loves that little mirror down there, and it's anchored on with a nail on either side, so I'm not worried about it going anywhere.  That's the toy box we built for her along with the no sew cushion I made.


Across from her room is her bathroom.  She loves the big tub in our bathroom, so I haven't touched this room yet.  I imagine it'll stay pretty plain for a little while, although she was begging me to get these bobble headed monkeys for her bathroom decor at bed, bath, and beyond the other day.  Already?!


So that's it!  Kalia's nursery.  What do you guys think?  It's still one of my favorite rooms in the house!   It is funny / odd to me that the moonshine gray color reads more blue in this house than in the last one.  I don't know if that's because the ceilings are all painted that almond color or just different light or what.  It's so different how almost every ceiling in the Texas houses that we looked at were painted the same as the wall color.  I had that same gray in Kalia's room, the in-law suite, the laundry room, our bathroom, and the half bath at the old house and it definitely didn't have a blue hue to it in any of those rooms.  Funny how paint does that!

Hope everyone had a great weekend!  Happy Monday!
If you enjoyed this post, please leave a comment or subscribe to the feed reader to get future posts delivered to your reader.


If you enjoyed this post, please leave a comment or subscribe to the feed reader to get future posts delivered to your reader.

Friday, April 27, 2012

Follow up Friday : Kalia's Bookshelves

I'm not sure if I'm going to keep up with this idea of follow up Friday, but I get a lot of questions and emails on the same posts, so I'm going to attempt to answer them all at once here.

A lot of you guys became readers because of all of our hard work with Kalia's nursery, and especially her bookshelves.  They are honestly one of my favorite things in her nursery, and I absolutely love everything that we did in there, so that says a lot!


Without further ado, answers to some of your most burning questions...errr...this is a family blog, promise!
  • How far apart did you space the bookshelves?
    • They are 13.5 inches from the bottom of one shelf to the bottom of the next.  I took the largest book we had (12 inches) and added 1.5 inches for some head room.  I didn't want there to be a lot of extra space.  I like the look of the bookshelves completely filled.
  • What length are the book shelves?
    • 5 feet long.
  • What about climbing?  That would never work in my house, I have too active of children!
    • Kalia's climbing, and has been for a little while.  She's just now starting to understand the word "no".  We can pull with all of our might on those bookshelves, and they don't budge.  We screwed them into the studs in the wall.  Each shelf has two screws.  After we screwed them in, I covered the hole with caulk, lightly sanded it, added another coat of white on top of the installed bookshelf, and another top coat of poly.  We consider those shelves built-ins.  If we ever leave the house, they stay with it.
  • What size screws did you use?
    • I'm actually not 100% positive on this answer, but I can give you a minimum that you should use.  You need to use screws that are long enough to get through the shelf (3/4"), the drywall (1/2"), and into the stud (1/2"), so I would go with at least a 2 1/2 inch screw.  I think we used 3" ones.
  • How far from the wall are the start of the bookshelves?
    • ~ 2 inches.  Most walls are not straight though, so make sure you use a laser level and mark points along the way.  That way they all line up with each other, even if they vary slightly from the distance off the wall.  We started the bottom one 2 inches off from the wall, and did the laser level from there.

As for how Kalia likes them, she loves them as well.  She pulls off the books that she wants to look at, flips through them, then says "all done" and we clap our hands when we put them back on the shelf.  She's just starting to learn how to put things back.  Even when she leaves books on the floor, it takes a maximum of three minutes to put them back on the shelf.  As any mother knows, most babies leave a wake of destruction wherever they go, so whether it's in her room or in her playroom (post on that soon!), it's all the same to me!

Do you see the blue cushions poking out from the corner above?  Here's a closer look :


I added floor cushions that used to live in my living room for a little nook for Kalia.  I snapped a few pictures of her 'reading' on different days.  Such a big girl already!  Happy baby = happy Momma!


Because Kalia hasn't learned how to "respect paper" yet, we have all of her hard, edible books on the bottom two shelves.  She can only reach those, so those are her safe books that are pretty indestructible.  The shelves above that are for books that we read to her either early in the morning, before nap times, or before bedtime.  She honestly doesn't have much patience for long books other than her wind down time.

Are there any other questions on her bookshelves that I left out?  Feel free to ask, and I'll update the list above with answers!

Happy Friday everyone, hope you guys have a great weekend!

If you enjoyed this post, please leave a comment or subscribe to the feed reader to get future posts delivered to your reader.


I'm linking up to the parties in my sidebar, go check them out!

Friday, March 25, 2011

Nursery Room - Book Shelves Filled!

First things first...thank you guys so much for all of your incredibly sweet comments and compliments regarding all of the blood sweat and tears we've put into the nursery!  Lets face it, I'm pregnant, hormonal, and clumsy, so all saying all three of those is no exaggeration!  I'm having a hard time just barely keeping afloat these days between my for real job that pays the bills :-), doing the nursery, and blogging about it all, so please forgive me for my lack of responses back.  I so appreciate every comment and read through every single one...you guys are the greatest!!

Okay, now that my hormonal side has gotten it's fill...onto the post!

As I mentioned previously, my first baby shower was this past weekend.  (When you have eight parents, 4 siblings, 3 sibling-in-laws, on top of aunts, uncles, cousins, and grandparents that all live in the same state...you get the benefit of having TWO baby showers...lucky us AND Kalia!!!)  My friend Jenny was in charge of invites, and one of the super cute things she did (I might have mentioned we did it for Janelle's baby shower that I did back in November...details smetails) was to add onto the invitation "In lieu of cards, please bring your favorite children's book to help Baby Hart stock her bookshelf!"

I'm so excited to say that Kalia's bookshelves no longer have any empty shelves!!


She, of course, could always still use more books, we'll just go for the layered effect for any more books that she does get!

This is such a cute idea for a baby shower by the way.  All the girls wrote their card to Kalia inside of the book, which definitely is a great memory that we'll forever cherish!

Here's a bunch of pictures from different angles (you're welcome for not posting all of them that I took!)

View from the closet with her alphabet wall
View from when you first walk in
View from Kalia's Crib
Two walls down, two more to go!!  We're getting there!!

I've got to do it, even though you've probably seen it a million times...one last good before and after shot of this wall...

Before...gross.  Just gross.  And embarrassing!
After!  So much Better!

Hope everyone has a great weekend...I, of course, have baby and nursery stuff (including maternity pictures with Erin--woot!) planned for my weekend.

And for those of you getting tired of nursery room posts, believe it or not, we have a few other house projects going on that will show up on here before too long.  Hopefully...ha!

Happy Friday!

If you enjoyed this post, please leave a comment or subscribe to the feed reader to get future posts delivered to your reader.

Wednesday, February 23, 2011

Nursery Room - Book Shelves

One of the many blogs I follow for design inspiration and ideas  is House of Turquoise.  Back in November, really before I even started plotting and planning for the nursery, a post came up with a nursery, and there was an idea that I knew I wanted to implement.  The design is from Elizabeth Sullivan.

Image Source
Those book shelves.  I had to have them for the nursery.  I absolutely love to read.  As a kid, if I wasn't playing some sort of sport, you could find me with my nose in a book.  I actually used to even get in trouble for reading...I'd sneak into the closet well after bedtime, turn on the light in there, and get lost in a book.  My parents would come in and scold me.  I was that kid.  So this wall of books has been haunting my nursery visions for quite some time.

The bookshelves themselves are actually pretty simple to make.  I measured where I wanted them to go on the wall, and came up with 6 bookshelves that were 5 ft long.

We got five 10 ft boards of 1x4's, and five 6 ft of 1x2 boards.  They didn't have the 1x2's in the 10ft size, otherwise we just would've gotten 2 of those and one 6 ft board.  The 1x4's were for the back and the bottom, and the 1x2's were for the front.

We started on these a few weeks back during the week.  After dinner, we'd go out and put a few more shelves together.

First, we cut the 1x10's in half :


And then we pre-drilled screw holes in the back and attached the two 1x4's to each other.


Next, we applied glue to the front of the 1x4...


Then clamped either end of the 1x2 to the 1x4 to hold the boards into place, and then we nailed the pieces together.


So when we were done, we had six of these :


Chris thought initially that we were making the shelves too wide, and that the 1x4's should go on top of each other.  I told him I was sure Ana had plans for something similar, so we came in to check to see, and sure enough...she does!  If you want step by step plans on how to do this with pretty pictures, go see Ana White's post on how-to build it here.  And if you want to build anything else, do a search for a plan there.  She probably has the how-to's drawn up.  She's amazing.

I was actually getting anxious to get all of these built.  So anxious in fact that Chris took my nail gun from me.  He left for a volleyball game one night, and I told him I was too tired to go.  He was fine with that, but as he was walking out the door he said "oh, and no nail gunning while I'm gone!!!"  What?!?!?!  He literally TOOK MY nail gun (remember, it was MY birthday present from last year!!!) with him to volleyball.  He said a pregnant wife + a nail gun + home alone + night time did not add up.  Sigh...

Which is why I got to multi-tasking on our floor installation.  While Chris was hammering away at the floors, in-between making cuts for the edges for him, I primed and sanded all 6 of these bookshelves.


This past weekend, Chris and I split up painting duties.  It was such a beautiful weekend that we could both be outside painting.  He was priming our next project while I was putting layer upon layer upon layer of beautiful white paint on these bad boys.  I'd paint them, sand them down some, and paint them again.  I really wanted them to be a bright white and have a smooth finish.  I finished up with a coat of minwax's water based polycrylic.  It's the only top coat I'll use for white painted furniture.  It goes on and dries clear without yellowing the piece like typical polyurethanes do.

Finally, these bookshelves were ready for installation!  We found the studs in the wall, and screwed directly into those all the way up.  We had to be careful to keep these level and mount them exactly the same space apart from the wall.  We didn't want any sort of leaning effect going on in here!


After we had gotten them all up on the wall, I caulked in the screw holes.  I went back the next day and added yet another coat of paint to the backs and fronts of these.  My T.Mom had sent over some books for me to use here, and my girlfriend Steph got us a waikiki lullaby book, so we added in what books we had, and I absolutely LOVE the end result!


Obviously, she needs more books!  And we'll want to mix in the tall and short books, so that the bookshelves are more visually appealing.  Like the bottom two rows.


I seriously could not be any happier with how this turned out.  I love love LOVE it!  Chris was really unsure of the project until we put the books on, and he's thrilled too.  The top shelf is his shelf.  That's the books that Daddy gets to read to her, since he's the only one that can reach it!  I'll try to keep more of the soft / touch books on the bottom shelves to start off with.

And because I'm a sucker for a good before and after...  I took a picture of each wall once we got the junk cleaned out.  Here's what that wall looked like a month ago :


And here's what it looks like now!


What do you think?!  Are you as enamored by it as we are?!  This wall seriously makes me so giddy every time I walk into her nursery.  I love the way it's all turning out!

Happy Wednesday everyone!  Hope you guys are having a fantasic week!

Update : Want to see the bookshelves fully filled?!  Click on this link to check it out!
If you enjoyed this post, please leave a comment or subscribe to the feed reader to get future posts delivered to your reader.


I'm linking up to the parties in my sidebar!
Related Posts with Thumbnails