
Just as a refresher, here's where the entry way started :

And here's where it was after my quick makeover of it a year and a half ago :

Which wasn't bad, it just wasn't great either. And it left us with zero privacy, which was no beuno.
The rest of the 'door story' isn't so quick, but I'll try to summarize so my post isn't a buzillion miles long! (Note...I fail miserably at this...if you just want to see pics, scroll on down!)
We saw Home Depot had a 15% off special order doors, which we knew we'd have to have because of our size, so we went into check it out...months ago. Like back in January. We found a door we liked that was marked down to $875 for the double doors, which was an amazingly great price, so we went to the door sales guy to place the order.
And the bill came up to something close to 2k. Umm...no, I want the $875 doors please. Apparently the door prices were mis-marked, but he did go through door company after door company, and threw in promo after promo to get us down to the $875 price. We had a 10% off coupon too, and he told us to go up to the service desk to pay for it, and we could use it there. Apparently they're not allowed to double dip, but if you go up to the service desk to pay, they don't know that there's been promotions applied already to the door, so you can generally get away with using another 10% off coupon.
Sa-weet...cha-ching! That left our door price down to right around $800 after all of the promos had been taken off and applied, and taxes added back in.
The door was supposed to be in a little over two months ago. It came late, and it came with all sorts of mistakes. The hardware wasn't the oil rubbed bronze, the door was flat instead of having an arch paneling, it wasn't double bore holed (holed for two entry way handles), and it opened on the wrong side (we switched the configuration to open on the right side instead of the left). All of which we didn't realize until we got home with this big huge heavy door and managed to get it in our garage.
I called HD and told them to come get our old door and order us a new one. For some reason, they were a whole lot more accommodating with me than Chris.
Fast forward two months, and our new door finally comes in. The guy swears that everything's checked out with it, so Chris goes by and picks it up and brings it home. After getting THAT one out of our truck, we realized it was missing a piece of weather stripping. I called and told them that they could bring me by a replacement piece that day because we weren't driving BACK to HD for just weather stripping. My pregnancy hormones must've been in full gear, because they gladly obliged.
Oh, and they took an extra $107 off the door. Sa-weet.
Well, now the big conundrum is how the heck we're going to install this massive door. There's no way I can hold it being 9 months pregnant, and there's no way Chris can do the door install by himself. So...Chris searched around, found a door installer, and had him all set up and ready to go for the week before last. Happy happy joy joy dance all around.
And then the guy emails, says it wasn't worth his time, and he wasn't interested in doing the job anymore. Yeah, he emailed that the night before he was supposed to get here. Great.
So, Chris called around some more, found a handy-man that charged $25 an hour, and got put on his list. The problem? His first available day was June 9th. My due date is May 30th. Oiy.
But I've taken the approach on whatever gets done before Kalia gets here, gets done. Whatever doesn't wasn't meant to be. June 9th it was.
The guy called this past week and said he had an opening and would we like to be squeezed in. Yes please!!! I was on strict request to hold Kalia in until the front door got installed.
Can you even imagine?! The thought of no front door whatsoever is WAY worse than the thought of a glass front door, but we really wanted that new door installed. And...we're not the type to be able to just sit around and WAIT for things, so...I stopped doing my labor dance and sat on my rear all day long trying to NOT encourage labor to get here.
Here's Chris beaming at lunch time...after they got the old frame out, and the new one in, and it was all plumb!
Do you see the one causality from ripping out the old door?
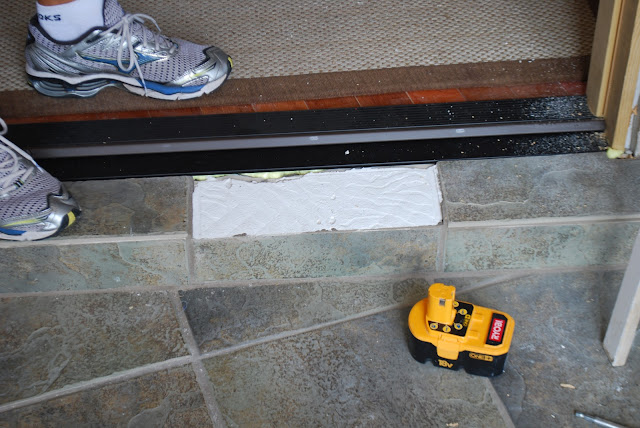
Apparently the old shoe kick thingy ma bobber (yes, that's my technical term) was screwed into the concrete under the tile, so when it came out, my piece of tile popped right off. Sigh...put it on the to-do list. We really weren't too concerned...we were just excited that our new front door was going in!
And after a loong day (6 hours with the handi-man, 3 extra hours with just Chris), our new front door, with our old hardware, was installed.

Look at how pretty those doors are!!

And here's a VERY happy Chris after the doors are in. Chris helped the handy-man to speed up the process, which saved us a ton of loot in the long run. They worked hard...all.day.long!
This past weekend, we worked on getting the doors finished. On Saturday, I sanded down both doors (Chris doesn't trust himself with a sander and anything expensive just yet), and then we each took a door and stained it. We waited the recommended 4 hours, and then applied another coat of stain on it.
On Sunday, we applied THREE coats of water based (low VOC for Kalia!) spar urethane, which is supposed to be good for interior and exterior wood finishes (most polyurethanes say interior use only), and sanded with 220 grit sandpaper in between each coat. Holy.forever.
We really were hoping that I didn't go into labor during all of this too. If I would've, there would've been boxes blocking the front door instead of hardware because we took all of the hardware back off to do the finishing work. We had a good chuckle on Sunday night, after the hardware was put back on, about our parents being at the hospital and asking for the keys to our house to go check on Kodi. We could just see us telling them "oh, no need...just move the boxes and walk right on in. Hopefully everything is still there!"
This week we fixed the broken tile from out front (it's still not 100% done, we need to re-grout it back in!), painted around the inside frame (the new frame is a little more narrow, so things aren't just a quick and easy replace...booo!), re-installed the trim on the inside, and added in the fill trim to account for the size difference. We still need to go back and add more caulk around the frames, paint the frames, and maybe give the walls one more coat, but this is good enough for now. I just wanted the framing at least on the doors in case Kalia decides to show up soon (please oh please!!!). After all that...here's the result of our hard work!!

We need to find a new runner to put in front of this door too, but for now, we're working with what we've got!


Onto the outside...


On our to-do list is repaint the rest of the house (we did just the back when we were re-doing the pool deck), but that is certainty not something I'm wanting to tackle this weekend, at 39 weeks pregnant!

And here's the fullMonty entry-way.

So what do you guys think?! Do you think we're a little crazy to be doing stuff like this with two weeks left till my due date?! I keep saying I'm ready, but now I'm REALLY ready!! I'm so happy with the way these doors came out, and I'm SO THANKFUL for our privacy!!
I might or might not have stopped in front of the door and sang out "I'm in my skivvies, yeah, I'm in my skivvies!!!" while doing some retarded looking form of a dance that's only acceptable for my hubs to see at 38 weeks pregnant. I could be making that up though. You wouldn't know, even if you lived in my neighborhood, because you can't see in anymore!!! Hallelujah!!
Whew...what a long post!! Congratulations if you made it to the end...
Happy Friday everyone!! Can you guys do me a favor and please get your 'labor dance' on for me...this Florida heat is getting to be too much, and I'm a-ready for Kalia to get here.
Hope you guys have a great weekend!

If you enjoyed this post, please leave a comment or subscribe to the feed reader to get future posts delivered to your reader.

Which wasn't bad, it just wasn't great either. And it left us with zero privacy, which was no beuno.
The rest of the 'door story' isn't so quick, but I'll try to summarize so my post isn't a buzillion miles long! (Note...I fail miserably at this...if you just want to see pics, scroll on down!)
We saw Home Depot had a 15% off special order doors, which we knew we'd have to have because of our size, so we went into check it out...months ago. Like back in January. We found a door we liked that was marked down to $875 for the double doors, which was an amazingly great price, so we went to the door sales guy to place the order.
And the bill came up to something close to 2k. Umm...no, I want the $875 doors please. Apparently the door prices were mis-marked, but he did go through door company after door company, and threw in promo after promo to get us down to the $875 price. We had a 10% off coupon too, and he told us to go up to the service desk to pay for it, and we could use it there. Apparently they're not allowed to double dip, but if you go up to the service desk to pay, they don't know that there's been promotions applied already to the door, so you can generally get away with using another 10% off coupon.
Sa-weet...cha-ching! That left our door price down to right around $800 after all of the promos had been taken off and applied, and taxes added back in.
The door was supposed to be in a little over two months ago. It came late, and it came with all sorts of mistakes. The hardware wasn't the oil rubbed bronze, the door was flat instead of having an arch paneling, it wasn't double bore holed (holed for two entry way handles), and it opened on the wrong side (we switched the configuration to open on the right side instead of the left). All of which we didn't realize until we got home with this big huge heavy door and managed to get it in our garage.
I called HD and told them to come get our old door and order us a new one. For some reason, they were a whole lot more accommodating with me than Chris.
Fast forward two months, and our new door finally comes in. The guy swears that everything's checked out with it, so Chris goes by and picks it up and brings it home. After getting THAT one out of our truck, we realized it was missing a piece of weather stripping. I called and told them that they could bring me by a replacement piece that day because we weren't driving BACK to HD for just weather stripping. My pregnancy hormones must've been in full gear, because they gladly obliged.
Oh, and they took an extra $107 off the door. Sa-weet.
Well, now the big conundrum is how the heck we're going to install this massive door. There's no way I can hold it being 9 months pregnant, and there's no way Chris can do the door install by himself. So...Chris searched around, found a door installer, and had him all set up and ready to go for the week before last. Happy happy joy joy dance all around.
And then the guy emails, says it wasn't worth his time, and he wasn't interested in doing the job anymore. Yeah, he emailed that the night before he was supposed to get here. Great.
So, Chris called around some more, found a handy-man that charged $25 an hour, and got put on his list. The problem? His first available day was June 9th. My due date is May 30th. Oiy.
But I've taken the approach on whatever gets done before Kalia gets here, gets done. Whatever doesn't wasn't meant to be. June 9th it was.
The guy called this past week and said he had an opening and would we like to be squeezed in. Yes please!!! I was on strict request to hold Kalia in until the front door got installed.
Can you even imagine?! The thought of no front door whatsoever is WAY worse than the thought of a glass front door, but we really wanted that new door installed. And...we're not the type to be able to just sit around and WAIT for things, so...I stopped doing my labor dance and sat on my rear all day long trying to NOT encourage labor to get here.
Here's Chris beaming at lunch time...after they got the old frame out, and the new one in, and it was all plumb!
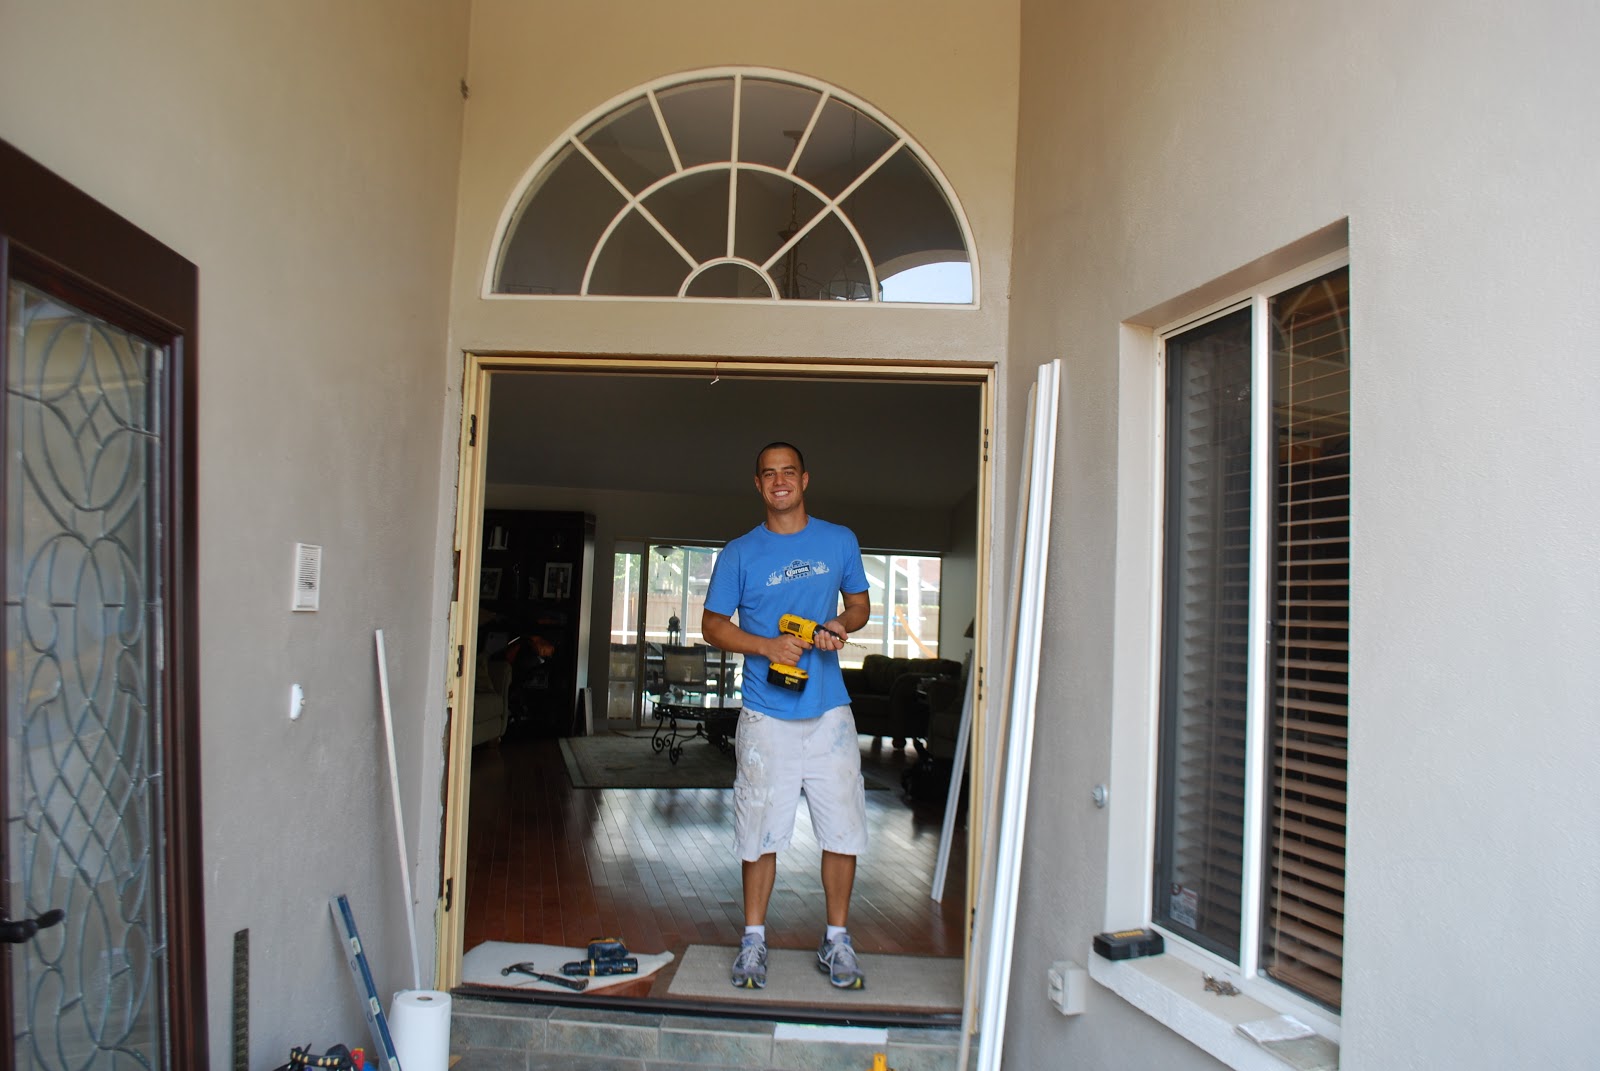 |
| As you can see, installing new front doors is way more than just taking off the old ones from the hinges and installing new ones! |

Apparently the old shoe kick thingy ma bobber (yes, that's my technical term) was screwed into the concrete under the tile, so when it came out, my piece of tile popped right off. Sigh...put it on the to-do list. We really weren't too concerned...we were just excited that our new front door was going in!
And after a loong day (6 hours with the handi-man, 3 extra hours with just Chris), our new front door, with our old hardware, was installed.

Look at how pretty those doors are!!

And here's a VERY happy Chris after the doors are in. Chris helped the handy-man to speed up the process, which saved us a ton of loot in the long run. They worked hard...all.day.long!
This past weekend, we worked on getting the doors finished. On Saturday, I sanded down both doors (Chris doesn't trust himself with a sander and anything expensive just yet), and then we each took a door and stained it. We waited the recommended 4 hours, and then applied another coat of stain on it.
On Sunday, we applied THREE coats of water based (low VOC for Kalia!) spar urethane, which is supposed to be good for interior and exterior wood finishes (most polyurethanes say interior use only), and sanded with 220 grit sandpaper in between each coat. Holy.forever.
We really were hoping that I didn't go into labor during all of this too. If I would've, there would've been boxes blocking the front door instead of hardware because we took all of the hardware back off to do the finishing work. We had a good chuckle on Sunday night, after the hardware was put back on, about our parents being at the hospital and asking for the keys to our house to go check on Kodi. We could just see us telling them "oh, no need...just move the boxes and walk right on in. Hopefully everything is still there!"
This week we fixed the broken tile from out front (it's still not 100% done, we need to re-grout it back in!), painted around the inside frame (the new frame is a little more narrow, so things aren't just a quick and easy replace...booo!), re-installed the trim on the inside, and added in the fill trim to account for the size difference. We still need to go back and add more caulk around the frames, paint the frames, and maybe give the walls one more coat, but this is good enough for now. I just wanted the framing at least on the doors in case Kalia decides to show up soon (please oh please!!!). After all that...here's the result of our hard work!!

We need to find a new runner to put in front of this door too, but for now, we're working with what we've got!


Onto the outside...


On our to-do list is repaint the rest of the house (we did just the back when we were re-doing the pool deck), but that is certainty not something I'm wanting to tackle this weekend, at 39 weeks pregnant!

And here's the full

So what do you guys think?! Do you think we're a little crazy to be doing stuff like this with two weeks left till my due date?! I keep saying I'm ready, but now I'm REALLY ready!! I'm so happy with the way these doors came out, and I'm SO THANKFUL for our privacy!!
I might or might not have stopped in front of the door and sang out "I'm in my skivvies, yeah, I'm in my skivvies!!!" while doing some retarded looking form of a dance that's only acceptable for my hubs to see at 38 weeks pregnant. I could be making that up though. You wouldn't know, even if you lived in my neighborhood, because you can't see in anymore!!! Hallelujah!!
Whew...what a long post!! Congratulations if you made it to the end...
Happy Friday everyone!! Can you guys do me a favor and please get your 'labor dance' on for me...this Florida heat is getting to be too much, and I'm a-ready for Kalia to get here.
Hope you guys have a great weekend!

I'm linking up to the parties in my sidebar...go check out everyone else's long-winded projects!


