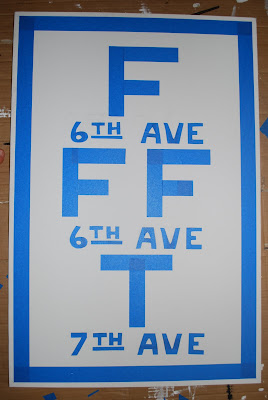
Yesterday's Subway Art Tutorial shows how I'm getting over-confident with my crafting skills. I've had quite a few projects turn out right, and now I'm getting way ahead of myself!
I knew I didn't do the first Subway Art picture correctly, and I'm not a quitter, so I picked myself back up (and my ego as well) and tried a different approach for Sign #2.
I lined the edges with tape the same (since that was the only part of Subway Sign 1 that I liked). Instead of painting the entire thing black this time though, I first cut out my Letters and Numbers from the painters tape. I knew that I wanted my two subway signs to have the same lettering (even if I didn't love the first one), so I traced out the shapes of the AVE letters in the tape and then cut around them.
If you look back at yesterday's post, you'll see that the 3rd letter is supposed to be S and underneath of that, it's supposed to say SPECIAL. By the time I'd reached this point, I was all about just doing whatever to finish up this project, so I took the easy way out. I have no clue if there's a subway station T at 7th AVE, but it was easy, so I went with it.
I painted the entire thing black. I tried initially to line around everything so that black paint wouldn't seep underneath the paint, but quickly gave up on that idea.
I removed the tape and was left with quite a bit of touch-up work to do.
After I traced and colored all of the letters with white paint, here's the final product on the wall:
All in all, this was my least favorite project, but I still like the way they look on the wall.
I've been working on decorating the living room for quite some time, and as I walk into the kitchen and look into it, I'm really proud and happy with the way it all turned out.
I started in April with hanging the ski's and picture frames on the wall, then built my bench with my fake sewed cushion for under the window, made over a clearance sign to relate to us and hung it above the ski art, made my key art for underneath my hung too high planked America, built some pallet shelves, added a new picture above the mantle, and finished with my subway art. Not all of the projects have come out perfect, but I am happy with the end results! I'm linking up to these fun parties...go check them out!


Yay, it looks so cozy now that all the walls are covered. Nice work crafty Kara. =)
ReplyDeleteThanks E!! I still don't consider myself crafty...just determined!
ReplyDeleteI follow blog entries involving DIY decorating and subway signs because I have an Etsy shop of affordable DIY customized Subway signs. subwaysign.etsy.com
ReplyDeleteYou have done a fabulous job on your signs! Great idea using painters tape.
Love it! It looks great on your walls!
ReplyDeleteI love these signs~and yours turned out so cute.
ReplyDeleteThanks Alisa and Suzanne! I appreciate the compliments!
ReplyDeleteLook at my latest post too. I just did some hand painted subway art and eye cart art. Your room looks just fabulous!
ReplyDeleteGreat idea! Love it! Pottery Barn or Ballard Designs was selling something like this but your's is much better! Thanks for sharing the DIY. This is something I would love to try!
ReplyDeleteJeanine
Thank you Molly and Jeanine!
ReplyDeleteHi Kara,
ReplyDeleteI know this is a little late, but I've always been frustrated by the painter's tape leaking, too. I've found something that REALLY works, no touchups needed: It's called Frog Tape. I just used it this weekend, it's great. I've also heard that if you paint over the blue tape with the color underneath it, it will seal the edges and when you paint over that, it won't leak. Love your project!
I love this...great job!
ReplyDeleteIf you were to do this again, you should paint the board white, then apply the tape, then paint the whole thing white again to seal the tape, then paint it black. Then the only paint that bleeds under will be the white.
ReplyDeleteThere is a trick to not having the paint blead under your tape. If you paint the edges of the paint with your base color it seals the tape and you have clean lines.It may seem like a lot but in the end you have nice chrisp lines and I think less painting because the tape holds all your lines! Makes painting less frustrating.
ReplyDelete