I know, I know, I disappeared again. That's because I'm now officially a Mom to a one year old, and I had about a million projects I wanted to get done before her first birthday party! That year most definitely flew by. I think I blinked a few times and then it was over. Pictures of the party and projects coming soon, I promise!
One of the things that's been on my to-do list for forever has been that fountain / bird bath that sits outside the front of our nicely painted home.

It's dingy looking and I'm not sure if you can tell in the picture or not, but the undertones in it are pink. Just like the pool deck and the front entry way used to be. Call me crazy, but I'm just not really a pink kinda gal.
I took the easy way out, initially, with redoing this fountain. I took my favorite Ocean Breeze spray paint from Krylon and went to town on it. I like blue and all, but this turned out entirely too blue for what I was going for.

That's okay though, I had a backup plan. I thought it might be a bit much with the bright bright blue and the old kind of feel of the fountain, so I added glaze to it to add back in that rustic / old vibe it was supposed to have. After waiting 10 minutes for the spray paint to dry, I smothered the entire thing in glaze.

And then just wiped it off.

Doing this piece by piece was really a lot of work. I kept stacking them up to make sure I still liked the end product before proceeding with the next one.

Look how much difference the glaze vs. non glazed section looks like on here :

And finally, after quite a few naptimes and getting eaten up by mosquitoes after bedtimes, I was left with this :

We coated it with polycrylic hoping that it'd keep a little bit longer in the weather, although the Krylon spray I used is indoor / outdoor. I'm not worried about the spray paint, moreso the glaze. I used the ocean breeze on the exterior lights in the back well over a year and a half ago, and they've held up to the Florida weather just fine.

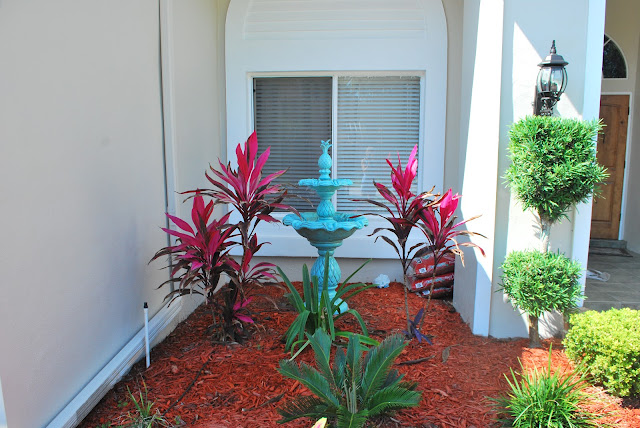
I really like the look of it against the red colored plants in the front. I'm sure they have a formal name, I just have no idea what it is!

I also like how the fountain color ties in with our ceiling color. As a side note, I think we hung the pendant in our entry way too high. Good thing Chris didn't clip the extra wire. He does want to shoot me though for realizing this after he thought we were done with that project. Oops!
Now onto the fun part ...the promotion! If you live in the Tampa Bay area and would like the opportunity to win a $2500 Lowe's shopping spree, listen up! All you have to do to win is visit one of the 15 participating area Lowe's (see more info here : http://www.krylonatlowes.com/), take a picture with your smartphone of you in front of the Krylon display, and text your photo to 80202. That's it! You can only enter once and the promotion runs through June 23rd. Every day two winners will receive a $25 gift card as well, so the sooner you enter, the better!
For those of you that know me personally, no, I didn't get a smart phone, and no, I didn't get text messaging. So, that's one more chance for you to win because I'm still in the dinosaur era and can't enter. Boo! One day I'll upgrade, one day!
So what do you guys think of my fountain redo? Too bold or out there for you? Anyone else have anything out of the ordinary color wise greeting passer by's?
Hope everyone has a wonderful Father's Day weekend, and if you're swinging by Lowe's to pick something up for your Dad, don't forget to enter the Krylon promotion!

If you enjoyed this post, please leave a comment or subscribe to the feed reader to get future posts delivered to your reader. One of the things that's been on my to-do list for forever has been that fountain / bird bath that sits outside the front of our nicely painted home.

It's dingy looking and I'm not sure if you can tell in the picture or not, but the undertones in it are pink. Just like the pool deck and the front entry way used to be. Call me crazy, but I'm just not really a pink kinda gal.
I took the easy way out, initially, with redoing this fountain. I took my favorite Ocean Breeze spray paint from Krylon and went to town on it. I like blue and all, but this turned out entirely too blue for what I was going for.

That's okay though, I had a backup plan. I thought it might be a bit much with the bright bright blue and the old kind of feel of the fountain, so I added glaze to it to add back in that rustic / old vibe it was supposed to have. After waiting 10 minutes for the spray paint to dry, I smothered the entire thing in glaze.

And then just wiped it off.

Doing this piece by piece was really a lot of work. I kept stacking them up to make sure I still liked the end product before proceeding with the next one.

Look how much difference the glaze vs. non glazed section looks like on here :

And finally, after quite a few naptimes and getting eaten up by mosquitoes after bedtimes, I was left with this :

We coated it with polycrylic hoping that it'd keep a little bit longer in the weather, although the Krylon spray I used is indoor / outdoor. I'm not worried about the spray paint, moreso the glaze. I used the ocean breeze on the exterior lights in the back well over a year and a half ago, and they've held up to the Florida weather just fine.

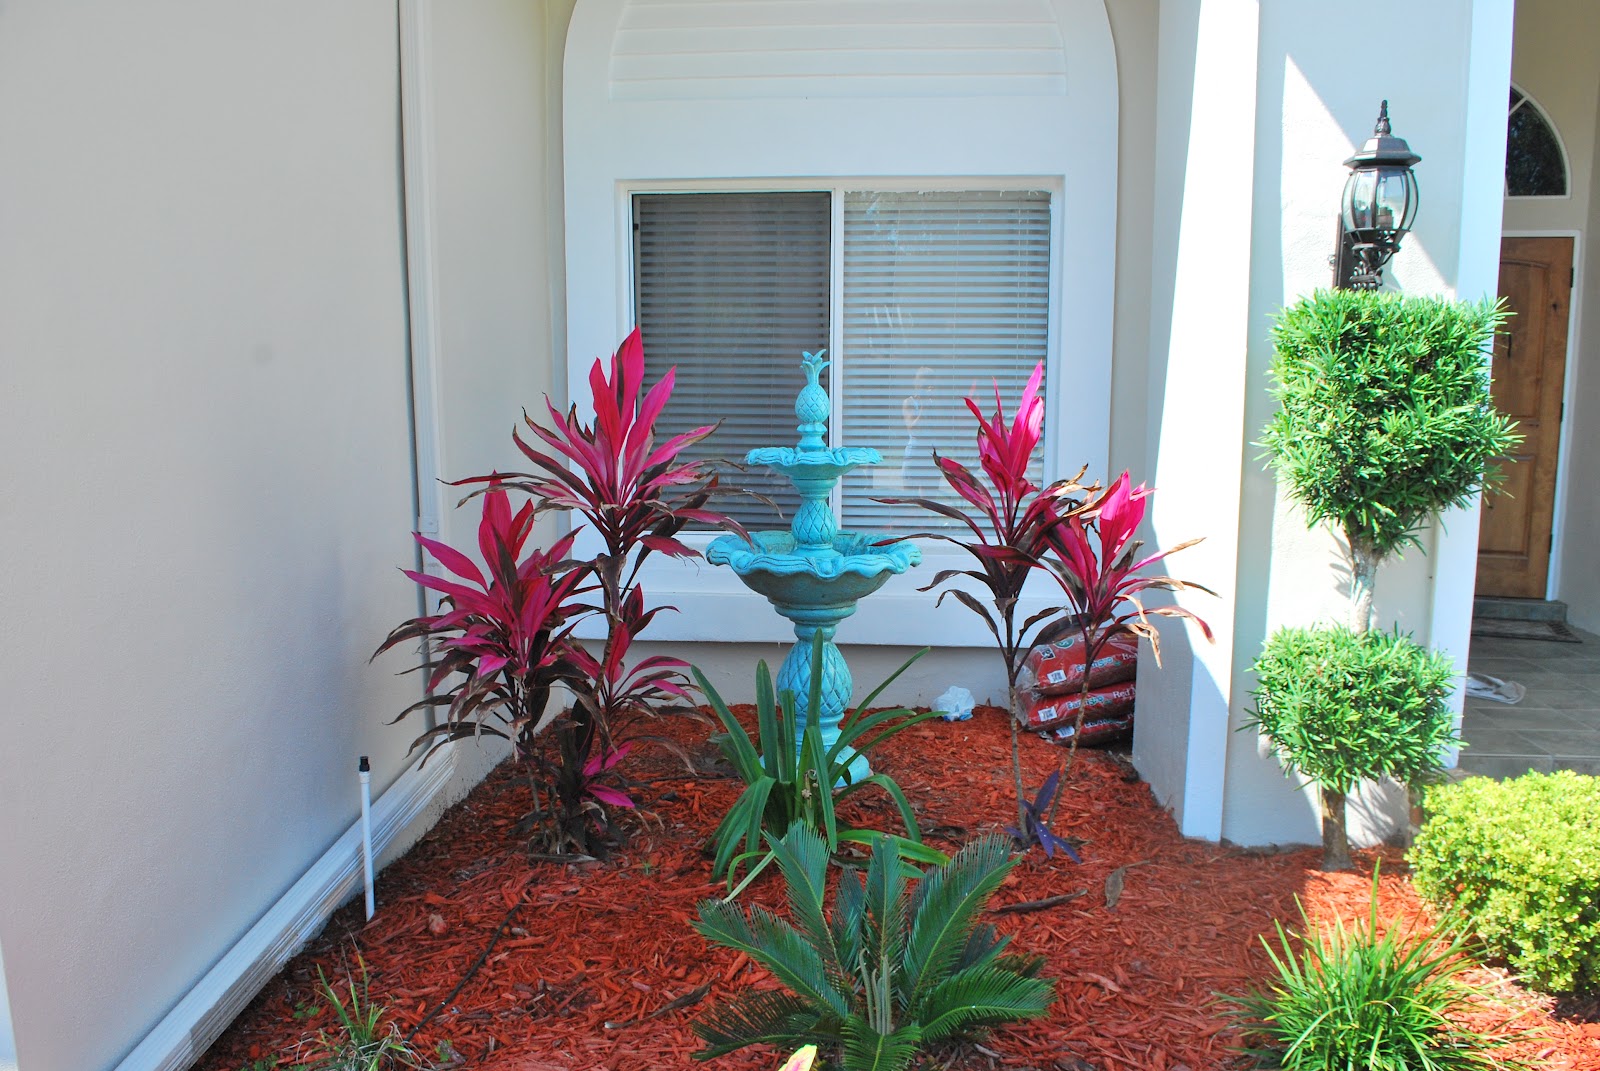
I really like the look of it against the red colored plants in the front. I'm sure they have a formal name, I just have no idea what it is!

I also like how the fountain color ties in with our ceiling color. As a side note, I think we hung the pendant in our entry way too high. Good thing Chris didn't clip the extra wire. He does want to shoot me though for realizing this after he thought we were done with that project. Oops!
Now onto the fun part ...the promotion! If you live in the Tampa Bay area and would like the opportunity to win a $2500 Lowe's shopping spree, listen up! All you have to do to win is visit one of the 15 participating area Lowe's (see more info here : http://www.krylonatlowes.com/), take a picture with your smartphone of you in front of the Krylon display, and text your photo to 80202. That's it! You can only enter once and the promotion runs through June 23rd. Every day two winners will receive a $25 gift card as well, so the sooner you enter, the better!
For those of you that know me personally, no, I didn't get a smart phone, and no, I didn't get text messaging. So, that's one more chance for you to win because I'm still in the dinosaur era and can't enter. Boo! One day I'll upgrade, one day!
So what do you guys think of my fountain redo? Too bold or out there for you? Anyone else have anything out of the ordinary color wise greeting passer by's?
Hope everyone has a wonderful Father's Day weekend, and if you're swinging by Lowe's to pick something up for your Dad, don't forget to enter the Krylon promotion!

*As a full disclosure, Krylon contacted me asking me to post about their promotion. In return, I received three cans of their spray paint.