Hard to believe my little girl turned one over two months ago. She grows so much every single day, sometimes it seems that if I blink, I miss some milestone that happened!
I tried telling myself I was going to keep Kalia's First Birthday party simple. I didn't want to spend a ton of money on it, and I wanted the decorations to be for Kalia...after all, it was her party. While I succeeded in making it so my decorations didn't cost a lot of moola, staying true to myself, the decor wasn't exactly simple...but Kalia loved all of them, so overall, it was a success!
Forwarning, this post is an overload of pictures (aren't most of my posts?!?!)! Special thanks to Erin and Chris for photographing Kalia's big day so Chris and I could just enjoy and celebrate. Kalia's first year was filled with so much more laughs, cries, tribulations, joys, and absolute amazement than I ever thought possible!
When you walked in the front door, this is pretty much what you saw. We hung crepe streamers from the pendant, which looked really cool at night, sort of okay during the day. Kalia thought it was amazing though, so that's what counted.

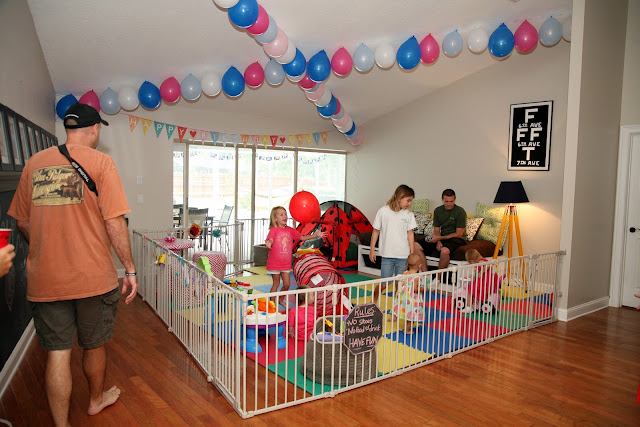
I also printed out the Happy Birthday Kalia banner, cut it out using my straight line cutter thing a ma bob (technical term for it!), used my hole punch to put holes on both sides of the letter, and then strung ribbon through it. I taped the back of the ribbon to keep it all in place. More than likely, you'll see that banner for future birthday parties as well!

Then, of course, there's the chalk wall with the window ledges we built and a bunch of our favorite pictures from Kalia's first year.

If you looked to the left of the front door when you walked in, you saw this :

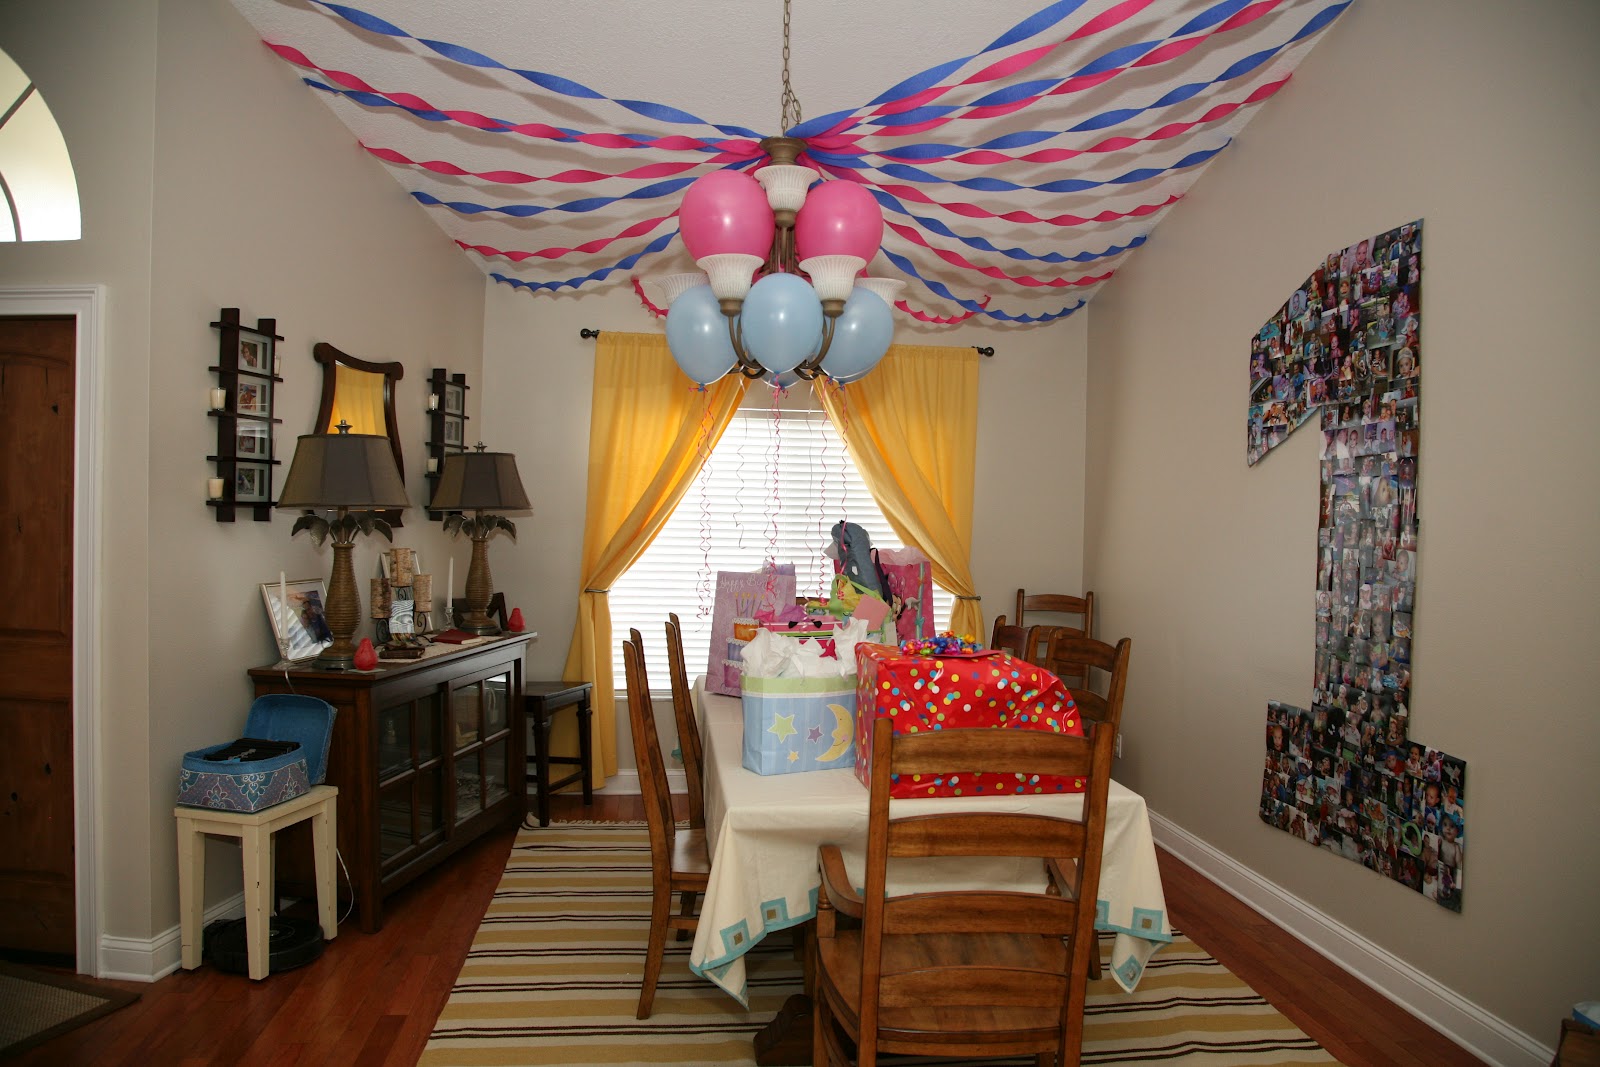
You can see the gifts chalk sign I made letting guests know where to drop them off. We blew up balloons and shoved them in-between the dining room chandelier and twisted crepe paper and hung it around the dining room. Kalia loved this too. Her eyes were drawn up for most of the week leading up to her party! The entire cost to decorate both of these rooms was $12. Not too bad, eh?
Here's a better look straight on :


The mammoth project of the entire birthday party was this giant number one. I initially tried to tape pictures in the shape of a one on the wall, and got about three pictures in before Chris told me that was ridiculous and went out to the garage and made me a cutout from some old cardboard boxes we had lying around. The bottom is actually taped on, but you wouldn't know with the pictures covering it. The top left was the most recent pictures and it went all the way down to the very beginning days of having Kalia home. This took a lot of time, but brought back so many fun memories.
To be 100% honest, this is still hanging in my dining room! Kalia goes up to it all day long and points out "Daddy!", "Momma!" and "Kodi!". I'll take it down and put these pictures in a photo album at some point, but probably not until I get to work on a project to replace it. Which might not be until she's two. Oh well, my house, I'm okay with it! I actually love to look at it too.


It's amazing to me to look back at those weekly pictures and see how much change occured every.single.week. When you're living in the moment, it seems like everything is the same, and then it's just...not...but documenting it week by week was something I'm really happy I can look back at.

Kalia absolutely loves the water. She's a little fish in there, so for activities, we just stuck to splashing around in the pool. Kalia couldn't have been happier!


...of course there were the chalk signs and fabric heart with Kalia's name on it too...


For the food, we kept it simple. We did sandwiches on fancy bread/bun things, fruit, and numerous other side dishes that family brought (thanks awesome parents!!).
Of course there were desserts. Anyone that knows me in real life knows that I can't bake worth a darn. My wonderful sister-in-law made these amazing cake pops that were a huge hit!

Her amazing mother made these deliciously cute cupcakes (good baking must run in their family ... my Mom can bake, I'm a mess, she didn't pass that gene down to me!)...

...and my amazing mother in law made these scrumptious cookies. Can you believe it was Chris's idea to stack them this way before people showed up? Love that man!

Kalia, of course, had her smash cake. I actually attempted to bake one the night before, but after you could throw it against the wall and put a dent in it, I called Publix and paid the $10 for a wee cake. Kalia was initially overwhelmed at everyone singing to her...

...but quickly got over it and dug in. She actually didn't like her cake though - she's not a fan of sugar just yet, and I plan to keep that up as long as possible!


Yay! The party was a success!

I'll end on a family photo from the end of the party. We had such a blast celebrating making it through the first year of Kalia's life. Some days we were in survival mode, but every day I'm thankful for. We are so blessed to have such a healthy, happy, and fun little girl. I wouldn't change one single thing for the world!

Gah, love both of them so much!!! So what do you guys think of the decor? It was a little time intensive, but Kalia loved it, so it was definitely worth it!
Hope everyone has a great weekend!

If you enjoyed this post, please leave a comment or subscribe to the feed reader to get future posts delivered to your reader. I tried telling myself I was going to keep Kalia's First Birthday party simple. I didn't want to spend a ton of money on it, and I wanted the decorations to be for Kalia...after all, it was her party. While I succeeded in making it so my decorations didn't cost a lot of moola, staying true to myself, the decor wasn't exactly simple...but Kalia loved all of them, so overall, it was a success!
Forwarning, this post is an overload of pictures (aren't most of my posts?!?!)! Special thanks to Erin and Chris for photographing Kalia's big day so Chris and I could just enjoy and celebrate. Kalia's first year was filled with so much more laughs, cries, tribulations, joys, and absolute amazement than I ever thought possible!
When you walked in the front door, this is pretty much what you saw. We hung crepe streamers from the pendant, which looked really cool at night, sort of okay during the day. Kalia thought it was amazing though, so that's what counted.

We blew up these balloons using our air compressor, and then threaded a needle through the bottom part of the balloon and pushed all of these along clear fishing wire. We used clear tape (with no adverse affects) to tape where the balloons crossed. Kalia would stare up at these balloons and say "ba! ba! ba!" all.day.long. The girl loves her some balloons!

I also printed out the Happy Birthday Kalia banner, cut it out using my straight line cutter thing a ma bob (technical term for it!), used my hole punch to put holes on both sides of the letter, and then strung ribbon through it. I taped the back of the ribbon to keep it all in place. More than likely, you'll see that banner for future birthday parties as well!

Then, of course, there's the chalk wall with the window ledges we built and a bunch of our favorite pictures from Kalia's first year.

If you looked to the left of the front door when you walked in, you saw this :

You can see the gifts chalk sign I made letting guests know where to drop them off. We blew up balloons and shoved them in-between the dining room chandelier and twisted crepe paper and hung it around the dining room. Kalia loved this too. Her eyes were drawn up for most of the week leading up to her party! The entire cost to decorate both of these rooms was $12. Not too bad, eh?
Here's a better look straight on :
The basket to the left (the table and basket don't normally live there) held the party favors for the wee ones.
I took inexpensive frames, fabri-tacked the back of them with fabric (pink for the girls, blue for the boys), and wrote the kids name on them in either pink or blue (again, girl or boy). For the most part, I actually had pictures of Kalia with the kiddo to put into the frames, but there were a few cases where the picture frame just held a blank sheet of photo paper with instructions on how to insert another picture in it's place. I glued twine to one side of the fabric, and then just pushed the backing shut after punching a hole through the center of the picture. Here's a blank one so you get the general idea. Imagine Kalia + a kid named Blake on that blank sheet of photo paper though!

The mammoth project of the entire birthday party was this giant number one. I initially tried to tape pictures in the shape of a one on the wall, and got about three pictures in before Chris told me that was ridiculous and went out to the garage and made me a cutout from some old cardboard boxes we had lying around. The bottom is actually taped on, but you wouldn't know with the pictures covering it. The top left was the most recent pictures and it went all the way down to the very beginning days of having Kalia home. This took a lot of time, but brought back so many fun memories.
To be 100% honest, this is still hanging in my dining room! Kalia goes up to it all day long and points out "Daddy!", "Momma!" and "Kodi!". I'll take it down and put these pictures in a photo album at some point, but probably not until I get to work on a project to replace it. Which might not be until she's two. Oh well, my house, I'm okay with it! I actually love to look at it too.
If you remember from Kalia's invites, the only sort of "theme" I had going on was pictures. I was successful at taking pictures every week of Kalia in her rocking chair with her pink pillow, and hung them around the pool deck in a clothes pin line.


It's amazing to me to look back at those weekly pictures and see how much change occured every.single.week. When you're living in the moment, it seems like everything is the same, and then it's just...not...but documenting it week by week was something I'm really happy I can look back at.


I think Chris might of had just as much fun as Kalia did!


For the food, we kept it simple. We did sandwiches on fancy bread/bun things, fruit, and numerous other side dishes that family brought (thanks awesome parents!!).
Of course there were desserts. Anyone that knows me in real life knows that I can't bake worth a darn. My wonderful sister-in-law made these amazing cake pops that were a huge hit!

Her amazing mother made these deliciously cute cupcakes (good baking must run in their family ... my Mom can bake, I'm a mess, she didn't pass that gene down to me!)...

...and my amazing mother in law made these scrumptious cookies. Can you believe it was Chris's idea to stack them this way before people showed up? Love that man!

Kalia, of course, had her smash cake. I actually attempted to bake one the night before, but after you could throw it against the wall and put a dent in it, I called Publix and paid the $10 for a wee cake. Kalia was initially overwhelmed at everyone singing to her...

...but quickly got over it and dug in. She actually didn't like her cake though - she's not a fan of sugar just yet, and I plan to keep that up as long as possible!


Yay! The party was a success!

I'll end on a family photo from the end of the party. We had such a blast celebrating making it through the first year of Kalia's life. Some days we were in survival mode, but every day I'm thankful for. We are so blessed to have such a healthy, happy, and fun little girl. I wouldn't change one single thing for the world!

Gah, love both of them so much!!! So what do you guys think of the decor? It was a little time intensive, but Kalia loved it, so it was definitely worth it!
Hope everyone has a great weekend!

Linking up to the parties on my sidebar, go check out everyone else's DIY parties!