Monday, November 29, 2010

Tutorial: Baby Shower Favor : M&M gift bags

Hope everyone had a fantastic Thanksgiving!! Mine was crazy, busy, fun, and filled with lots and lots of family...you know, the norm.  There are so many things I have to be thankful for this year...I am just immensely blessed!

I didn't get a chance to post a tutorial on one last item I made for the baby shower before the actual baby shower, so you get the tutorial after the baby shower.  I'll post pictures this week sometime on everything in action.

Initially I had this idea to put blue and brown M&M's in baby food jars and relabel them for the shower.  All of my friends are either pre or post baby food stages though, so baby food jars were hard to come by.  I know I can buy them, but I was looking for a resourceful way of doing the favors (I mean, isn't the shower about the Mommy and Daddy to be anyways?!), so I nixed the baby jar ideas.

The next best thing that was just as economical was making thank you bags with the M&M's.  The individual little bags you get at the craft store weren't any better than what I could make myself, so I went the homemade route for this too.  Here's the full tutorial!

1.  Get a giant bag of M&M's (I love the peanut ones...it fills the bags better) and separate the candies into the color groups that you want in baggies.  I initially just did blue and brown, but as you can see from the brown bag, they were quite lacking, so I mixed in orange (it IS a Gator baby after all) to do blue and orange thank you's as well.


2.  Next, I got the same number of cups as bags I planned on making and distributed my M&M's into these cups evenly.  I started with 5 per cup and worked from there.  My husband wants to know why I'm only OCD when it comes to my crafts and projects and not cleaning the house, doing the laundry, etc..  Um, because the fun factor in all of the chores is zero, and I'm purely motivated by fun factors.

3.  Ignore this cute, but pathetic looking face as he tries to nose your M&M's.  Chocolate and human food in general is not for you Kodi-man, sorry!


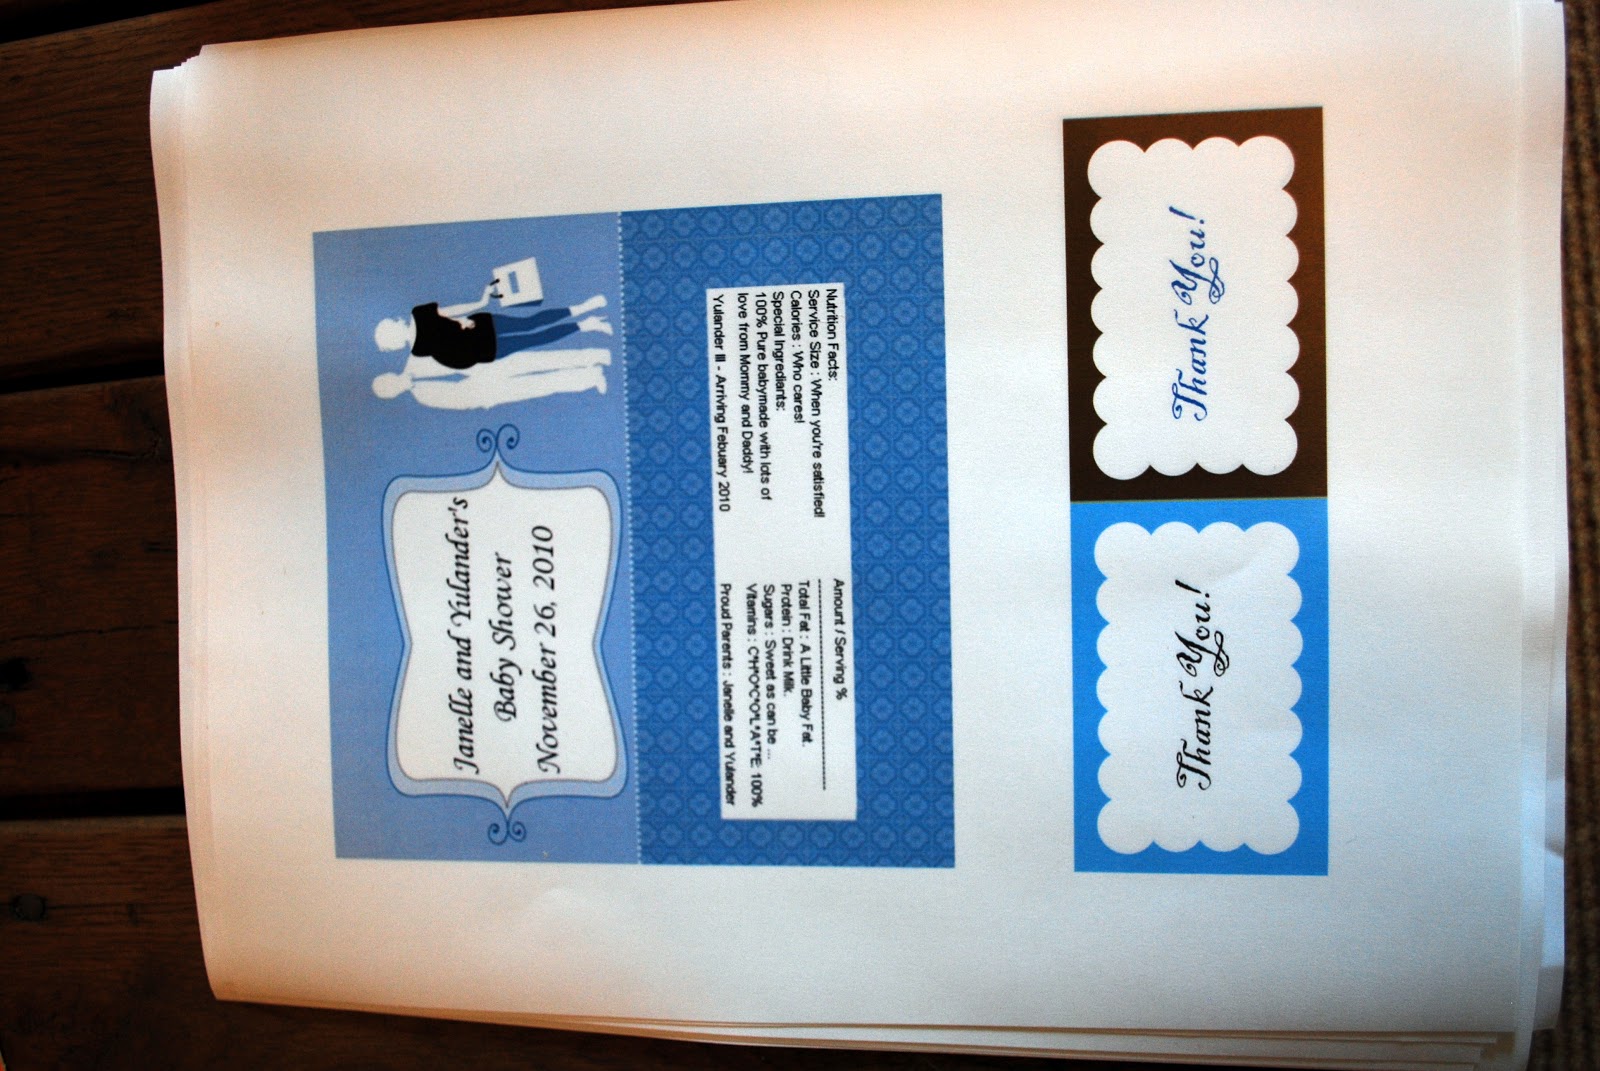
4.  Find label toppers that you like.  I took these cloud ones from Tart Workshop and edited them in Paint to say Thank you.  I only printed out the blue and brown ones.

5.  Cut your papers.  Remember to use your paper cutter instead of your scissors!!  Saves SO much time!


6.  Take a roll of Clearphane and cut it into strips wide enough to make baggies.  Error on the side of too much, you can easily go back and cut off the excess later.


7.  Using your labels as a guide, cut your strips again.  You want your strip to be slightly smaller than your labels.


8.  Fold your strip in half.


9.  Staple both sides of your strip to form your bag.


10.  Dump M&M's in.  Pat yourself on the back for this actually working.


11.  Take your label and hold it on top of your bag, making sure to line it up.


12.  Staple the sides, bottom, and top of your label.


So the finished product looks like this:


and this from the back (but not sideways...sorry, ran out of time to edit!) :


13.  Repeat a million more times.  I found it easiest to cut all of my labels, then cut all of my strips, then staple all of my bags.  Doing it one by one seemed to take a lot longer.


14.  Admire your pretty, economical,  Thank You bags!!


They went in a pretty bowl for the actual baby shower...this Tupperware container was just for transporting.  Stay tuned to see the entire baby shower all put together!

Happy Monday!

If you enjoyed this post, please leave a comment or subscribe to the feed reader to get future posts delivered to your reader.


I'm linking to the parties on my sidebar...go check out what everyone else is up to!

Wednesday, November 24, 2010

Refinishing a Melamine Changing Table

Yep, another baby post.  This one isn't a craft though, this one is a furniture makeover...more up my ally than the rest of the posts.

Our friends know that my hobby is to build things, so they asked if I'd make them a changing table.  With my complete lack of any free time with the holidays and Chris's school, and my funds running rather short with those two as well, I did the next best thing...I found one on Craigslist and re-did it for them.

Their requests were that the changing table had drawers, not shelves, and that it be coffee colored.  I scoured craigslist for FOREVER trying to find a wood changing table that I could refinish.  I finally found one that looked like it would fit the requirements, with one slight problem.  I found it on the craigslist where my parents live.  I called my T. Mom and asked if she wouldn't mind going to check it out, and if it was wood and looked good, to go ahead and get it for me.  I'm lucky I have nice and helpful parents, I know.

When they came over the weekend of November 12th, they brought it with them so I'd have time to work on refinishing it.  My initial plan was to try to get it ALL done Thanksgiving day, which was an absolutely dumb idea and there's no way it would've worked out.  Thank goodness they're smarter than I am and brought it on over.


Do you see the problem with this furniture makeover yet?  It's not really all wood like I'd build with.  It's the melamine / particle board finish that a lot of furniture is made with, but that isn't all that easy to refinish.  Oiy.

First, I attempted to sand, and then re-stain this.  I knew it wasn't going to work, but I still wanted to try.  I used 150 grit sandpaper just to lightly sand the surface and then stained a small section along the back.  You can actually see that in the first picture.  Unfortunately, my intuitions were right, and all of the stained rubbed off really easily.

Time for plan B.  Gel Stain.  I've used Gel Stain before on my front door.  My Dad actually suggested that we use it when I wanted to go for the stained look, but my door was fiberglass (or so I thought, under like 300 layers of paint, it really was wood, but that's another story in and of itself).

Gel Stain will stick to a lot of surfaces, melamine included.

There are a few downsides though.

  • It's really hard to get a completely even finish.  You can go super slow and think that you have a super even coat, and it still will dry a little uneven.  It's unfortunate, but it's a reality.  Check your "it's got to be perfect" hat at the door.
  • It takes FOREVER to dry.  The container says 6-8 hours before a recoat, and 24 hours dry time I think.  Mine took more like 48 hours.  If you touch it or attempt to do anything with this piece inside of that time, you will leave streaks on it.  I do live in Florida, so I do realize that humidity and temperature play a part here, but still be very cautious on this.
  • You need to work relatively quickly in sections.  You can go over your previous brush stroke, but you've got at max a 5 minute window before you just start smearing the gel.  This plays into the hard to get an even finish qualm as well.
  • Your color options are limited.  My Home Depot had a light wood, a cherry wood, and a brown wood color and that was it.
  • It is significantly more expensive than a can of regular stain.
So again, the huge benefit is that you can get the stained wood look that you want on a less than ideal surface, but it is a wee bit of a pain.

I don't have step by step pictures of this one...I did this whole thing over the course of a week and a half.  I finished up on Monday putting my 2nd coat of polyurethane on it.  Whew...just in time to let it dry before heading over for the holidays.

I got these cute knobs at Anthropology.  Obviously, the pink wasn't gonna work with the baby boy they're having!


Here's a close up of the knobs in action :


I actually didn't tighten the knobs all the way...we have to take it over for the shower, so we might need to remove them then, and I didn't want them to struggle with trying to get them off when they try to transport this beast home.  So, ignore the slightly crooked knobs please!

Here's the finished product :


I'll end on one last picture of my diaper cake standing where it'll go for the shower.  One of the diaper babies is going to go on the changing table here as well, but positioning those babies can be semi time consuming, so you'll have to wait until baby shower pictures to get the full effect.


I really hope the Mom and Dad to be like it!!

ONE more day till Thanksgiving!!!  Woo Hoo!!
If you enjoyed this post, please leave a comment or subscribe to the feed reader to get future posts delivered to your reader.


I'm linking up to the parties in my sidebar...go check them out!

Tuesday, November 23, 2010

Tutorial : Baby Shower Favors : Hershey's Bars

As promised, here's another post on more things baby shower.  I've actually got another set of favors that I'm hoping to miraculously get done tonight, so this is just party favor number one.

I've actually done these before, quite a number of years ago, for a baby shower and they were a big hit.  I also remember them being a big pain in the rear, so why I opted to do them again, I'm not quite sure.

I do know one thing.  I think I've officially mastered, or at least gained quite a bit of experience decoupaging.  Yep, you heard me right, decoupaging.

I decoupaged Hershey's Bars.  Is that normal?  (Am I normal?  Well, we all know the answer to that one...so lets just move on to the tutorial...)

1.  Go to Sam's or Costco or some other store that sells things in mass quantities and pick up a box of Hershey's Bars.

2.  Mess around in paint / word / picasa / photoshop ... whatever your editing method of choice is and come up with a design that you like to go on your wrappers, and then print them out.


3.  Cut out your wrapper design.


Hint : For you non-crafty people like me who like to attempt to be crafty, but really have no clue what they're doing, this :


is far superior to this :


Trust me on this one...go spend the money to buy even just a cheap paper cutter.  Your patience will thank you.  I won't even go into how much time I wasted cutting each paper, piece by piece, before I came to this realization...but it was A.LOT.

4.  Fold wrapper at crease between where you want the separation between the front and the back.


5.  Put decoupage on the top and top-back portion of your Hershey's bar.


6.  Put decoupage on the portion of your wrapper that you want to wrap from the front to the back.


7.  Press wrapper down until it stays on its own.


8.  Put decoupage on the top of the piece that you just folded over, and then put decoupage on the top of the back design.


9.  Press down, connecting back to front, and then decoupage over the whole thing.


10.  Let dry, then smile at your cool and somewhat homemade party favor.


11.  Repeat  THIRTY FIVE more times.  Try not to stab yourself in the eye in the process...it might seem like more fun, but it's all really worth it in the end.


Ahhh...finished.  Give yourself a pat on the back, you did it!!!  Then go work on more baby stuff...

Which will be posted about tomorrow!!  Hope everyone's enjoying their Thanksgiving week...two more days!!  Today, I'm most thankful to have these DONE!

I could've bought these wrappers online, but it would've cost me somewhere between $30 - $35 for what I wanted just for the wrappers.  If I wanted to include the chocolates and have them wrap it for me, it would've been closer to $85-$90.  The box of Hersey's bars was about $20...all in all, this project with the materials might have run about $1/bar.  $36 vs $90...hmmm...the pain in the rear approach was definitely worth saving the extra $$!

Oh, and p.s.  Service size is not a typo...or at least I'm not admitting that it's one after all of this.  Chocolate is servicing your belly....that's my story and I'm sticking to it!!

If you enjoyed this post, please leave a comment or subscribe to the feed reader to get future posts delivered to your reader.


I'm linking to the parties in my sidebar...go see what other pain in the rear projects people are coming up with!

Monday, November 22, 2010

Diaper Cake

This weekend was filled with quality time with good friends (more on that in a later post) and lots and LOTS of baby shower projects.

First up, I finished my diaper cake.  A few of you suggested the diaper cake when I posted my diaper babies, and it was already well in  the works!  I made the diaper babies out of left over diapers I had from making this cake.  I think I probably used about 75 newborn sized diapers.

There's tutorials all over the web on how to do this, but I'll show you what I did :

First, wrap a million diapers up in rubber bands :


Next, get either a bottle, or if you're in a crunch like me and don't feel like running to the store to get one, unwrap your paper towels from your holder, and use the cardboard tube that comes with it instead of a bottle.  Hey, it works.


Trim the cardboard roll so that it's just slightly higher than 2 stacks of the diapers, like so:


Take your rolled diapers and start putting them around your center.  I found it easiest to do the top piece first.  I put a big rubber band around the layer, then shoved in diapers.


For just the top layer, I removed it from the center piece and added another diaper in the center.  That way you don't have a big hole in the middle your cake topper.


For the bottom layer, I repeated this with 3 separate layers.  After I was finished with one layer, I'd put one diaper on the outside of that layer, and put a rubber band around it, and then shove the diapers in the rubber band.


The middle layer was 2 rows, and the top was 1.  Here's what it looked like with all of that :


I couldn't find wide ribbon that I liked the colors or design of, so I made my own.  I took a brown underlayer of 1 1/2 inch ribbon and used my trusty fabri-tac to secure a smaller ribbon in the middle of it.  I taped the ribbon to the outer layer of the rubber band to get the ribbon band started:


Then I wrapped the entire ribbon around the cake, pulled tight, and used fabri tac to secure the back side of the ribbon to itself, like so:


And the final product:


I'm actually really happy with how this came out...it looks so cute, and what it's sitting on (the changing table) is going to be it's 'home' for the shower, and I love them together.  Stay tuned for another post this week on the changing table (and MORE baby shower stuff...can you even handle it?!?!)

Hope everyone had a great weekend!  I got 3 more people checked off for Christmas gifts...wahoo!!!  Makin' progress...

OH, and...today is my wonderful husband's 29th birthday.  So those of you that know him, drop him an email, phone call, or a comment here to wish him a Happy last year of his 20's!!  I'm so thankful he was born 29 years ago, I don't know what I'd do without him!!

If you enjoyed this post, please leave a comment or subscribe to the feed reader to get future posts delivered to your reader.


I'm linking up to the parties in my sidebar...go check them out!

Friday, November 19, 2010

Baby Garland

I see all of you creative bloggy folks creating great Thanksgiving and Christmas gardlands. Well, I'm in baby shower mode, so that's what I'm sharing. My own baby garland. 'Cept it's not made with papers...just string, onesies, booties, socks, bibs...you get the idea.  And it's more like a clothes line with baby clothes, but I'm gonna call it baby garland.

Yall's reaction (yes, I say yall, no I don't think that makes me a huge southerner, but maybe I'm just in denial...) to the diaper babies I posted on Wednesday had me literally laughing out loud. I think the responses are about 50/50. Half of you think it's cute and creative, and half of you think it's totally creepy. I get both, I really do.

But, in my defense, the babies aren't going to be lying on my carpet in the middle of my bedroom floor, or on my bathroom vanity, so I still think they're going to look cute. We got the mamma and pappa to be their changing table (stay tuned for a post on that!), so I actually think one of the babies on the changing pad is going to look super cute. Or super creepy I guess, but because all of our friends are nice, they'll at least pretend it's super cute. I'll take pictures and post. I promise.

Onto the baby garland!!


Making some of these things ahead of time is a wee bit tricky because the shower is at my parents home...and we live about 3 hours from each other. So, I called my T.Mom and asked the size of the window to make these. I full expect to have to redo them, but at least I've had a trial run and know what I'm in for this time.

I can't get over how cute the little socks are!!  SO tiny!
My parents have these beautiful open windows to the river that I'm going to hang these from. I have no clue HOW I'm going to hang them yet, but I guess I'll figure all of that out once I get there. Did I mention the shower is the day after Thanksgiving? Yep...now it all makes sense as to why I'm trying to get as much as possible done before heading 'home for the holidays'. The things we do for friends, huh? They're totally worth it, I promise.

Chris missed his calling to be a super model...he's such a trooper!

 And they're Gator fans...big Gator fans...we tailgate and go to every game with them. Which makes them smart on top of everything else. And they're bringing a little Gator Boy into the world...can you hear it? "And the world will be a better place...yeah the world, will be a better place." My poor husband. I just actually sang that out loud.

No, I haven't had too much wine to drink...or any actually. I'm just excited that my to-do list is finally getting smaller! Cross this one off!

Again, I promise I'll take pictures next week (holy smokes, the shower is only one week away!!). It'll look way better all set up. If it doesn't, I think my handsome hubby holding the string is pretty darn good lookin myself, so that might be my backup plan. Hmmmmm...

Hope everyone has a great weekend!! Last big one before Turkey Day!
If you enjoyed this post, please leave a comment or subscribe to the feed reader to get future posts delivered to your reader.


I'm linking up to the parties in my sidebar...go check out what other people are putting together for their parties!
Related Posts with Thumbnails