
I was hoping to have the final front door post to you guys today, but keeping up with work, my two mile daily walks, and everything else is getting a little rough these days with being 1 week and 5 days from my due date. Hopefully by Friday we'll have it completely done.
Just a reminder from last week, tomorrow I'm taking an early lunch break and hosting Gevalia Coffee's Bean Chat on facebook at 10 a.m. EST. They're giving away three bags of coffee during the chat, so if you want to pop over and chat with me about any of my latest projects, or just like coffee, come join me! I'll post another reminder again tomorrow.
Today though, another nursery post...
One of the finishing things left to do in Kalia's nursery was put up blinds. Unfortunately, the ones we wanted came either 1.5 inches too short, or about 20 inches too long. So, rather than have Kalia's window look like it was wearing pants on that were just a little too short, we went with the longer option. (Side note : My D. Mom used to make my sister and I wear 'tall socks' when we started to outgrow our pants. Maybe that's why I'm not a big fan of pants that are too short! Haha!)
We didn't really want the longer version to bunch up at the bottom though, so we did a little DIYing to make them fit to our window. Which is a standard window by the way...we bought and installed it from the big orange store...so that made the fact that there wasn't blinds to fit the actual window that much more annoying!
I really love the look / feel of textured bamboo blinds. I love that they bring outdoor elements in, and I also thought they would tie in nicely to the baskets that we already have in Kalia's daybed.
To shorten our blinds, first we measured up how far we wanted the bottom of the blinds to hang.

Then Chris took the craft knife and cut along one of the thick bamboo slats. We looked at how the bottom of the blinds were initially put together, and then mimicked it. We wanted to make sure we had enough extra to not lose any of the smaller bamboo pieces, so we cut below where we actually wanted to cut (which was the dark brown big slat), so that we could glue up the excess string.

Like this. It doesn't matter that the glue isn't pretty, this part is getting folded over anyways!

And then we added more glue and folded our bottom piece over top of the brown piece to give a nice clean finished look. It mimics what was previously there perfectly!

FYI, the glue we use is quick grip. I'm too impatient to use much else...that stuff has a super strong hold and dries really quickly too!
Here she is hung in her new home.
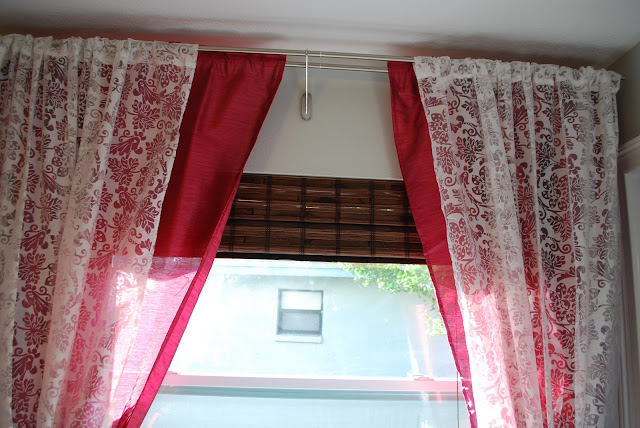

I was actually really impressed by how dark they are when they're all the way down too. This picture is horrible because only the overhead light is on, but you can tell the difference that the blinds actually make!

And thankfully, you can see that we still have a little ledge left at the window...so there's not a bunch of excess blinds getting in the way! Woo Hoo!

Anyone else have to modify their 'standard' blinds to fit their standard sized windows or did we get a defective window / blind? What do you think of the bamboo blinds to finish off the window treatments in the nursery? I had initially really wanted to build a valance to go over top of all of this, and maybe one day we'll get back to it, but it was one of the few projects that Chris insisted get crossed off the list for the nursery. The other project was painting stripes on the ceiling! At this rate though, we need to start on nursery #2 before too long!! Oiy!
Hope everyone is having a great week. If you're available, pop over to the Gevalia Bean Chat tomorrow on Facebook from 10-11 a.m. EST to chat along with me. Happy Wednesday!

If you enjoyed this post, please leave a comment or subscribe to the feed reader to get future posts delivered to your reader. Just a reminder from last week, tomorrow I'm taking an early lunch break and hosting Gevalia Coffee's Bean Chat on facebook at 10 a.m. EST. They're giving away three bags of coffee during the chat, so if you want to pop over and chat with me about any of my latest projects, or just like coffee, come join me! I'll post another reminder again tomorrow.
Today though, another nursery post...
One of the finishing things left to do in Kalia's nursery was put up blinds. Unfortunately, the ones we wanted came either 1.5 inches too short, or about 20 inches too long. So, rather than have Kalia's window look like it was wearing pants on that were just a little too short, we went with the longer option. (Side note : My D. Mom used to make my sister and I wear 'tall socks' when we started to outgrow our pants. Maybe that's why I'm not a big fan of pants that are too short! Haha!)
We didn't really want the longer version to bunch up at the bottom though, so we did a little DIYing to make them fit to our window. Which is a standard window by the way...we bought and installed it from the big orange store...so that made the fact that there wasn't blinds to fit the actual window that much more annoying!
I really love the look / feel of textured bamboo blinds. I love that they bring outdoor elements in, and I also thought they would tie in nicely to the baskets that we already have in Kalia's daybed.
 |
| I really am going to fix the basket liners soon...really, I am. |

Then Chris took the craft knife and cut along one of the thick bamboo slats. We looked at how the bottom of the blinds were initially put together, and then mimicked it. We wanted to make sure we had enough extra to not lose any of the smaller bamboo pieces, so we cut below where we actually wanted to cut (which was the dark brown big slat), so that we could glue up the excess string.

Like this. It doesn't matter that the glue isn't pretty, this part is getting folded over anyways!

And then we added more glue and folded our bottom piece over top of the brown piece to give a nice clean finished look. It mimics what was previously there perfectly!

FYI, the glue we use is quick grip. I'm too impatient to use much else...that stuff has a super strong hold and dries really quickly too!
Here she is hung in her new home.


I was actually really impressed by how dark they are when they're all the way down too. This picture is horrible because only the overhead light is on, but you can tell the difference that the blinds actually make!

And thankfully, you can see that we still have a little ledge left at the window...so there's not a bunch of excess blinds getting in the way! Woo Hoo!

Anyone else have to modify their 'standard' blinds to fit their standard sized windows or did we get a defective window / blind? What do you think of the bamboo blinds to finish off the window treatments in the nursery? I had initially really wanted to build a valance to go over top of all of this, and maybe one day we'll get back to it, but it was one of the few projects that Chris insisted get crossed off the list for the nursery. The other project was painting stripes on the ceiling! At this rate though, we need to start on nursery #2 before too long!! Oiy!
Hope everyone is having a great week. If you're available, pop over to the Gevalia Bean Chat tomorrow on Facebook from 10-11 a.m. EST to chat along with me. Happy Wednesday!

I'm linking to the parties on my sidebar...go check 'em out!


