Wednesday, June 30, 2010

I'm Sew Excited!


Does anyone know what this is?!


Maybe from this angle?


Just in case you still haven't figured it out, here's the final clue:


Yep!  It's a sewing machine cabinet, with the sewing machine to go along with it!!  I took it from my T. Mom this past weekend, and am SO (or should I say sew?!) excited about it!

For those of you that know me personally, this is probably hilarious to you.   Yes, it's true, I don't know how to sew a button on...and I have a new found love of fabri-tac for clueless people like myself.  But I think I can do anything, and next on the list is to conquer sewing!

So if any of my crafty friends that live over in this area want to come over and give me a tutorial on how to use this beast, I'd love it!  Otherwise...there's always the internet.

I've got a few big projects I'm working on...being out of town last week left me little to blog about craft wise this week!  Hope everyone's having a great week...happy hump day!

Monday, June 28, 2010

Breast Cancer Support

For the newbie followers to my blog, this may seem off topic, and perhaps it is from the crafting, DIY part of me, but this blog is my corner in the world, and this topic touches so close to home with me, so please bear with me on this post.  For some background perspective, please read this post.

I recently signed up to do a half marathon through The Leukemia and Lymphoma Society's Team in Training.  To read more about it, check out this post, or click on the link on the sidebar under the Please Help Make a Difference tag to view my personal fundraising website.  This is my second go-round with this organization.  There are many many good organizations to get involved with when it comes to the battle with cancer, but LLS is the one that is my personal fit.  I think if we find the cure for blood cancers, all other cancers will follow suit.

I do support Breast Cancer Research as well, and am SO thrilled at my newest affiliate program that I've been approved for through google blogger.  ShopKomen.  I'm sure most of us have heard of Susan G. Komen with their Race for the Cure.  Now you can "purchase with a purpose to end breast cancer forever" through my blog.  By doing this, you not only support the Susan G. Komen Foundation, you ALSO support LLS.  I'm using my blog as a fundraiser tool for my efforts.  Every dollar made through my race day goes towards LLS.  

Please check out the store and support both breast cancer and blood cancer research and patient aid.  Your support is beyond appreciated!!  If you'd like to come back later to make a purchase through my blog, just click on the link on the sidebar to get to ShopKomen.

I hope everyone had a fantastic weekend!  I had my 10 year high school reunion...it's amazing how quickly time flies! I had great fun reuniting with so many friends, but it's back to the real world...and the house projecting...now.  Stay tuned for more projects coming your way!

Friday, June 25, 2010

I love America

I'm patriotic.  I love my country.  In my living room, you can see a subtle theme of God Bless America with my wood planked USA and the picture hanging over my mantle.  So on Tuesday of last week, when Ana from Knock-Off Wood posted these plans, I knew I had to make it.  As usual, the original came from Pottery Barn.  Yep, I definitely like their style, just not their price!

Planked Patchwork Flag
Image Courtesy of Pottery Barn

Ana's plans call for scrap wood.  Slight problem...I didn't have enough scrap wood to make this.  I wasn't even close.  So we went dumpster diving to get it all.

We cut all of the various wood pieces to size.  We did have to adapt a bit due to the wood from the crates not measuring exactly the same as wood from big blue or big orange would.  We laid all of the wood out on our sheet of plywood and made a few adjustments until we had our square.


I used our sander with 60 grit paper and sanded each piece individually until my arm almost fell off.  I was thrilled with how good the wood looked after some serious sanding!


I used the Minwax Water Based Wood Stain tinted in china red and midnight blue, along with the white oak to stain my boards.  I mixed the midnight blue with the white oak until I came up with a light blue color I liked and used that.  If you do this, make sure you mix enough for 2 coats!  I didn't come up with a gray color, I just stained the white boards with quite a few coats, and then left the ones that were supposed to be gray with only two coats of the white stain.


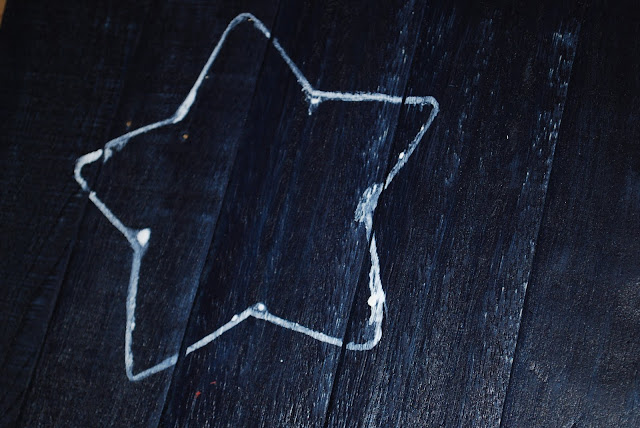
I found stars at Jo-Ann's and traced them onto my boards with a thin paint brush and my white stain, and then painted inside the lines.


I love it.  These pictures were taken after I put it all together.


Chris helped me glue all of the boards down, trying really hard to keep our square.  We also nailed in the tiny 1 inch nails for an added detail.  Ready to see her in all her beauty?!


Oh...you'd like to see a few image from the side?  Okay!


Back to the front...


And to be fair, we have to add in the other side.


I still have to add the wall hangers on the back, but this one might be a gift, so I couldn't just yet.
Just in time for the 4th too.  God Bless America!!  Do you love her as much as I do?!  I'm linking to these fun parties...go check them out!

Hope everyone has a fantastic weekend!!

Thursday, June 24, 2010

Garden Party

I'm still not done with my project I've been working on from dumpster diving, but I'm close!  Psst...want to take a sneak peak at my project?  Check it out here!

In the meantime, why don't you go check out Keen Inspirations Garden party? I'd love nothing more than to grab a glass of sweet tea and sit outside to admire some of these ladies garden projects! Too bad it's just too darn hot in Florida to do that right now. I linked up my rock project, rock garden, and my mini pot makeover. If you've got some fun garden or yard parties, be sure to link up too!


Happy looking!

Wednesday, June 23, 2010

No Fail No Bake White Chocolate Pie Recipe

This recipe is honestly, truly, 100% no fail.

How do I know this? I tried to fail. I tried really really hard, and I couldn't.

I don't bake. I can cook, but I do not bake. I used to try. I had a few good desserts and a whole lotta fails. Shortly after we got married, I asked my husband to tell me his favorite dessert. After he went through a list of his favorite desserts from his Granny, his Mom, his Step-Mom, some family friends, some aunts, etc., I decided that I was taking off my baking hat and letting all of the other women in his life that know how to bake so well take care of that part for me. We both appreciate their efforts more this way.

Besides, it's the 20th century. I don't do laundry either, but I run the lawn mower through the fence mow the yard. It's a give and take world...ya know?

So, back to the recipe. I was on the phone with my MIL the other day and she tells me that she's got this great pie recipe that she's going to send to me. My immediate reaction? "Um, you know I don't bake." I love my hubbies family, and I feel no need to cover up my short comings. They all know all about me...for better or for worse, till death do us part!

After she laughed, she told me it was an easy NO BAKE recipe for a delicious pie, and that's why she thought of me. She is one smart lady, I tell ya!

We went to Publix on Sunday evening.

Chris: "Why are you getting white chocolate and a pie crust?"
Me: "I'm going to make you a pie!"
Chris: "Um, honey, you don't bake."
Me: "I KNOW that, but your Mom sent me a recipe for a NO-BAKE pie. How awesome is that?"
Chris: "I'm not sure yet...I'll tell you after I eat the first piece".

We have a strict honesty policy in our house. Unless I specifically ask Chris to lie to me (for example: Subway Art Sign), he has to tell me what he really thinks about all of my projects and all of my cooking. I don't offend easily.

I was tired Sunday night after dinner, but I really really wanted to make this pie. I had so much faith in my MIL that I bought enough ingredients to make four pies for my neighbors as well.

Ingredients:
4 oz. white chocolate, finely chopped
(I cheated and used morsels)
½ lb. cream cheese, at room temperature
¼ cup sugar
1 tsp vanilla
1/3 cup sour cream
½ cup heavy cream, chilled
(this might be too chilled)
1 banana, thinly sliced
one ready-made graham cracker crust (9 inches)

Directions:
1. Warm the chocolate in a bowl set over a pot of lightly simmering water. Remove from heat when only partially melted; stir to melt completely.


2. Beat the cream cheese, sugar, and vanilla until smooth. Beat in the chocolate, then the sour cream.


3. Whip the heavy cream until firm; gently fold into chocolate filling.


4. Put the banana slices on the crust, top with the filling, and chill at least 2 hours. If you’d like, sprinkle with grated dark chocolate before serving.


I initially had everything correct, and then started thinking (that's where I go wrong on a lot of things) about my measurement conversions, and for some reason, thought that 1/2 lb of cream cheese was NOT equal to 8 ounces, instead it was equal to 4 ounces. So I went back and doubled everything else (I was already at the end of step 2 when I had this epiphany, so I just added in the sugar, vanilla, and more chocolate all at once.) After I had completed all of that, I realized that I am indeed a moron every time I think, and that 8 ounces is indeed a half a pound, so I softened 8 more ounces of cream cheese and added that, again, to step two, at the very end.

I told you, I tried to fail.

I also have no clue if my version of firm heavy cream is correct. And I'm not sure the difference between whipping and beating. I basically knew how to do steps 1 and 4 and had an epic fail with step 2 and took my best guess at step 3.

Guess what? It turned out delicious!!!! Chris even thought so!!


I did use non-fat sour cream, low fat cream cheese, and splenda instead of sugar. Seriously, scrumptious, so good! So easy, and there's no way you can mess it up. Now, that is my kind of recipe! If you make it, let me know. Thanks for the great recipe MIL. I'm linking up to these fun parties...go check them out!

Tuesday, June 22, 2010

Dumpster Diving

The title says it all.

Most 20 something year olds without kids go out with friends, or have a few drinks, or go to a movie on Friday nights. Not us. We went dumpster diving.

Let me tell ya...it was amazing! Seriously, no joke.

There's a pretty ritzy (I think the cheapest house might be 750k) neighborhood around the corner from us that has all custom built homes. We jog through the it every now and then, and last week I realized something.  The containers that their materials come in are amazing.  The quality of wood is good, and it has a ton of character.  Perfect for a project I had in my mind.

We, of course, had to go back to get it.  Slight problem...the community is gated, and the gates are closed at night, and there's no way I'm going dumpster diving in the middle of the day with a bunch of wealthy people giving me weird looks.  I do draw my lines at some point.

So we waited until it was dark.  Then we waited (yes, we were totally captain obvious) until a car came by and followed it in.  Our wait was only a few minutes...lucky us!!

To our good fortune (maybe our luck has something to do with my new lucky bamboo), the 'money dumpster' was square in front of the model home, which we knew wasn't occupied, and next to that was a home in the middle of being built.  Sweet!

My good-sport-of-a-husband literally got INSIDE the dumpster and starting chucking out these huge crates, and good planks of wood until we filled up the back of the truck.  I was the loader and look-out.  Can you hear the Mission Impossible Song?!

Wanna see our loot (and my hubby's big goofy grin at being so excited at our find)?!


Oh yeah, we scored the motherload!


We unloaded all of this, and went to bed.  On Saturday morning, after our 6 mile run, we came home and started tearing these bad boys apart.  What.a.mess.


If you know my husband, you know that he's very anal particular about keeping our garage clean.  We took everything apart and made our 'keep pile'.


Then we loaded his truck back up with the non-keepers and tailed someone else in after dark on Saturday night to give those back.  Chris saw nothing wrong with this at all.  He kept saying "If they stop me, I'll just tell them that I took it out of THEIR dumpster, helped myself to what I wanted, and then put the rest BACK in their dumpster.  It was their trash to start off with, so I'm just giving it back!"

Oh...sometimes my husband's logic makes me laugh!

Both vehicles slept in the nice, clean garage on Saturday night.  We were exhausted, but still had to celebrate our good fortune at our very first experience dumpster diving.


Ah...strawberry margaritas (and Kodi treats)...the perfect end to a perfect night (for all three of us)!

Stay tuned for a post at the end of this week on what we created with all that wood!

Monday, June 21, 2010

Love is Patient

I overheard Chris on the phone yesterday morning with his Mom and Step-Dad having a good laugh at my expense over my running the lawn mower through the fence ordeal, and I realized that I forgot to blog about it. And since I'm a big fan of people laughing, whether it's at my expense or not, I decided that would be my blog topic today.

First, let me start by showing you my beast of a lawn mower that I (yes, I, not the hubby) mow with:


She's a beast and I love her.  She acts up at times, but the love is still there.  Her name is Bessie.

When Chris and I moved into this house in April of last year, we spent a day unloading and moving our stuff into the house, and then immediately starting working on putting up a 400 linear foot fence.  We've got a 1/2 acre, and a Kodi, so that fence had to go up ASAP.  Initially we had quite a few helpers, and for one reason or another, it wound up being just Chris and I until my T. Mom came over to help save the day.

So the fence has meaning.  We built it.  We love our fence.  We worked hard for that fence.  It was the very first DIY project at our 'forever home'.

There's a tight corner on one side of the yard that Bessie barely fits in, but I still try every single week to mow as close as possible to the landscaping and the fence.  I got in too close to the panel of the fence to make my turn, so I put Bessie in revere to get out of there.  Or so I thought.

I didn't switch the lever all the way to reverse, and when I pulled on the arm handle that says reverse, Bessie flew forward.  Crack.


Lucky for me, the top was still attached.  Chris came running around from the other side frantically asking if I was okay, and this is what he saw:


I was physically fine, but emotionally peeved.  So, I did what comes naturally to me (and probably most wives) and blamed him.  I told Chris it was his fault that I ran the mower through the fence because he didn't edge a wide enough area, so I had to try to get it with the lawn mower.  Whaaa?

Chris just looked at me, shook his head, sort of grinned, and walked away.  After I finished mowing the rest of the yard, I went to put Bessie up and apologized, and we worked together to put the fence back in working order.

The whole lawn mower ordeal made me realize something.  I tell Chris constantly that it's a good thing that we have Kodi to teach him patience before we have kids.  He used to have none.

I think that maybe being married to me, who is the biggest klutz, super accidentally destructive, accident prone, and we can do anything (like literally, lets try to move mountains) type attitude has taught him quite a bit of patience over the years.  Good thing...because if our someday kids are anything like either one of us destructive wise, we'll need lots and lots and LOTS of patience!

So what about you?  Are any of you as destructive or accident prone as I am?  Please do tell if so!

Friday, June 18, 2010

Mini Plant Pot Makeover

I decided I needed the plant kind of green in my living room for the pallet shelves. I headed to Lowe's and came across these four.


They were small, and they're lucky bamboo to boot (who doesn't need a little extra luck in their life, right?), so they came home with me. The only problem was the mini-pots they were in were just kind of blah. I set them in the pallet shelves, and decided immediately that I needed to put something underneath them to elevate them a bit.

But then the blah base would be showing. And I don't want blah in my newly redone living room.

So, they got a face-lift.  I took my leftover fabric from making my bench cushion, my trusty fabri-tac, and got to work.


That one, I confess, I messed up on.  Initially I thought I should empty everything out and glue it down, but it wound up being much easier to just leave the plant and rocks in place.  This one has a little bit of an issue if I put in too much water.  It gets the fabric wet...sigh.

One side note...do not water the plant BEFORE doing this project.  You'll wind up with a lap full of water when you try to fold the ends over.  Just make sure to pull everything VERY tight to keep ripples from forming, and glue down as you go.  Then wrap the bottom like a present.  It doesn't have to be pretty...it's the bottom!

The tops were still lacking, so I took a piece of burlap(ish) fabric that I had received as a tie around  a set of books, and added that to the top.  I wound up cutting the ribbon at an angle at the top so it could fold nicely over the rim of the plant.  I basically cut a 45 degree angle, or mitered, my corners.


Here's all four of them completed:


So much cuter!

I haven't built up anything yet to set them in the pallet shelves, but had some leftover wood wedges that I put under them for now.


I think I need to do some sort of book wrapper or magazine wrapper around the other things in the pallet shelves to clean up the look a little bit.  It just looks kind of busy to me.


Or maybe I'll just relocate them to my kitchen window.


It's an easy peasy little spruce up that cost me nothing in addition to the $8/plant I paid. What do you think? Kitchen window or pallet shelves?

Hope everyone has a fantastic weekend!! I'm excited to say that I've got an after work date with the hubby at Home Depot today!! Woo Hoo!!!

I'm linking up to these fun parties...go check them out!
Related Posts with Thumbnails