
For many of you, Kalia's nursery was what brought you over to my blog in the first place. Here it is at our last house :

And here's what it started with there :

Yeah, about a million times better. Maybe 2 million. We did so many DIY projects in there, it was definitely a labor of love.
Kalia hasn't adjusted so well to the move. We were in an apartment for a month, which was so confusing to her. She's at that awkward age where she remembers stuff, knows what she wants, but can't exactly express it or her emotions that she's feeling. The first time she talked to any other little kid since the first week of us being here was the 4th of July. She still won't talk to adults.
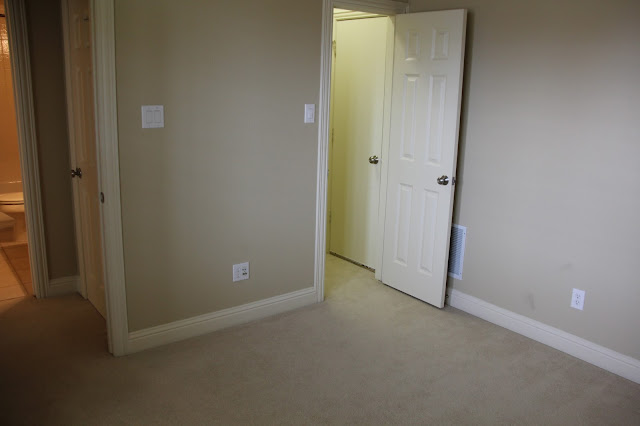
So, we knew it was so important to get her room set up just the way it was before asap. We were so so thankful that my MIL came to help out with the move. It allowed us to paint Kalia's room prior to the movers showing up with our stuff (walls moonshine by benjamin moore and closet lucerne by benjamin moore), and on day 2 of living there, get everything on the walls the exact way it was before. Here's what we started with. Much better than the above before picture!


And here's what it looks like when you walk in :

I did say previously that those bookshelves would stay if we ever left our Florida house. I never really thought we'd leave when I said that though. They came with us.

The wall here is a little bit smaller so we had to cut them down by about 8 inches. I think they're my most favorite thing still.

The ABC wall is Kalia's favorite. She asked for it nonstop when we were in the apartment. When we moved here that was the first thing she asked for "ABC's on the wall!!!". Chris didn't really want to put 26 more holes in the wall, but Kalia and I outnumber him!


Here is the view from Kalia's closet on the other side of the room.

I realize the curtains look like high-waters. They work for now, and I really do love the curtains, just wish they were longer. I'll probably sew something on there when they start to bother me too much. When she's ready for her big girl bed, one of the daybeds will go where the dresser is, and the dresser will move to the other wall. I still don't love the cream trim, and all of my accents are white though. If I win the lottery I'll pay someone to paint all of the doors, shutters, and trim white. Gotta get on playing first!

We built the bookshelves, dresser, and the K with my maternity pictures of Kalia on there. All of that is linked up in Kalia's initial nursery tour here.
Here's the view to the left of the crib.

You can see the picture frame with fabric and mini clothes pins I did for her before she was born. I want to hang them closer together, they bug me as is. We spaced them a little bit too far apart.

Kalia's closet was "prettier" at the last house, but she's got more room with it here. She loves that little mirror down there, and it's anchored on with a nail on either side, so I'm not worried about it going anywhere. That's the toy box we built for her along with the no sew cushion I made.

Across from her room is her bathroom. She loves the big tub in our bathroom, so I haven't touched this room yet. I imagine it'll stay pretty plain for a little while, although she was begging me to get these bobble headed monkeys for her bathroom decor at bed, bath, and beyond the other day. Already?!

So that's it! Kalia's nursery. What do you guys think? It's still one of my favorite rooms in the house! It is funny / odd to me that the moonshine gray color reads more blue in this house than in the last one. I don't know if that's because the ceilings are all painted that almond color or just different light or what. It's so different how almost every ceiling in the Texas houses that we looked at were painted the same as the wall color. I had that same gray in Kalia's room, the in-law suite, the laundry room, our bathroom, and the half bath at the old house and it definitely didn't have a blue hue to it in any of those rooms. Funny how paint does that!
Hope everyone had a great weekend! Happy Monday!

If you enjoyed this post, please leave a comment or subscribe to the feed reader to get future posts delivered to your reader.

And here's what it started with there :

Yeah, about a million times better. Maybe 2 million. We did so many DIY projects in there, it was definitely a labor of love.
Kalia hasn't adjusted so well to the move. We were in an apartment for a month, which was so confusing to her. She's at that awkward age where she remembers stuff, knows what she wants, but can't exactly express it or her emotions that she's feeling. The first time she talked to any other little kid since the first week of us being here was the 4th of July. She still won't talk to adults.
So, we knew it was so important to get her room set up just the way it was before asap. We were so so thankful that my MIL came to help out with the move. It allowed us to paint Kalia's room prior to the movers showing up with our stuff (walls moonshine by benjamin moore and closet lucerne by benjamin moore), and on day 2 of living there, get everything on the walls the exact way it was before. Here's what we started with. Much better than the above before picture!


And here's what it looks like when you walk in :

I did say previously that those bookshelves would stay if we ever left our Florida house. I never really thought we'd leave when I said that though. They came with us.

The wall here is a little bit smaller so we had to cut them down by about 8 inches. I think they're my most favorite thing still.

The ABC wall is Kalia's favorite. She asked for it nonstop when we were in the apartment. When we moved here that was the first thing she asked for "ABC's on the wall!!!". Chris didn't really want to put 26 more holes in the wall, but Kalia and I outnumber him!


Here is the view from Kalia's closet on the other side of the room.

I realize the curtains look like high-waters. They work for now, and I really do love the curtains, just wish they were longer. I'll probably sew something on there when they start to bother me too much. When she's ready for her big girl bed, one of the daybeds will go where the dresser is, and the dresser will move to the other wall. I still don't love the cream trim, and all of my accents are white though. If I win the lottery I'll pay someone to paint all of the doors, shutters, and trim white. Gotta get on playing first!

Here's the view to the left of the crib.

You can see the picture frame with fabric and mini clothes pins I did for her before she was born. I want to hang them closer together, they bug me as is. We spaced them a little bit too far apart.

Kalia's closet was "prettier" at the last house, but she's got more room with it here. She loves that little mirror down there, and it's anchored on with a nail on either side, so I'm not worried about it going anywhere. That's the toy box we built for her along with the no sew cushion I made.

Across from her room is her bathroom. She loves the big tub in our bathroom, so I haven't touched this room yet. I imagine it'll stay pretty plain for a little while, although she was begging me to get these bobble headed monkeys for her bathroom decor at bed, bath, and beyond the other day. Already?!

So that's it! Kalia's nursery. What do you guys think? It's still one of my favorite rooms in the house! It is funny / odd to me that the moonshine gray color reads more blue in this house than in the last one. I don't know if that's because the ceilings are all painted that almond color or just different light or what. It's so different how almost every ceiling in the Texas houses that we looked at were painted the same as the wall color. I had that same gray in Kalia's room, the in-law suite, the laundry room, our bathroom, and the half bath at the old house and it definitely didn't have a blue hue to it in any of those rooms. Funny how paint does that!
Hope everyone had a great weekend! Happy Monday!


