
As promised, here's another post on more things baby shower. I've actually got another set of favors that I'm hoping to miraculously get done tonight, so this is just party favor number one.
I've actually done these before, quite a number of years ago, for a baby shower and they were a big hit. I also remember them being a big pain in the rear, so why I opted to do them again, I'm not quite sure.
I do know one thing. I think I've officially mastered, or at least gained quite a bit of experience decoupaging. Yep, you heard me right, decoupaging.
I decoupaged Hershey's Bars. Is that normal? (Am I normal? Well, we all know the answer to that one...so lets just move on to the tutorial...)
1. Go to Sam's or Costco or some other store that sells things in mass quantities and pick up a box of Hershey's Bars.
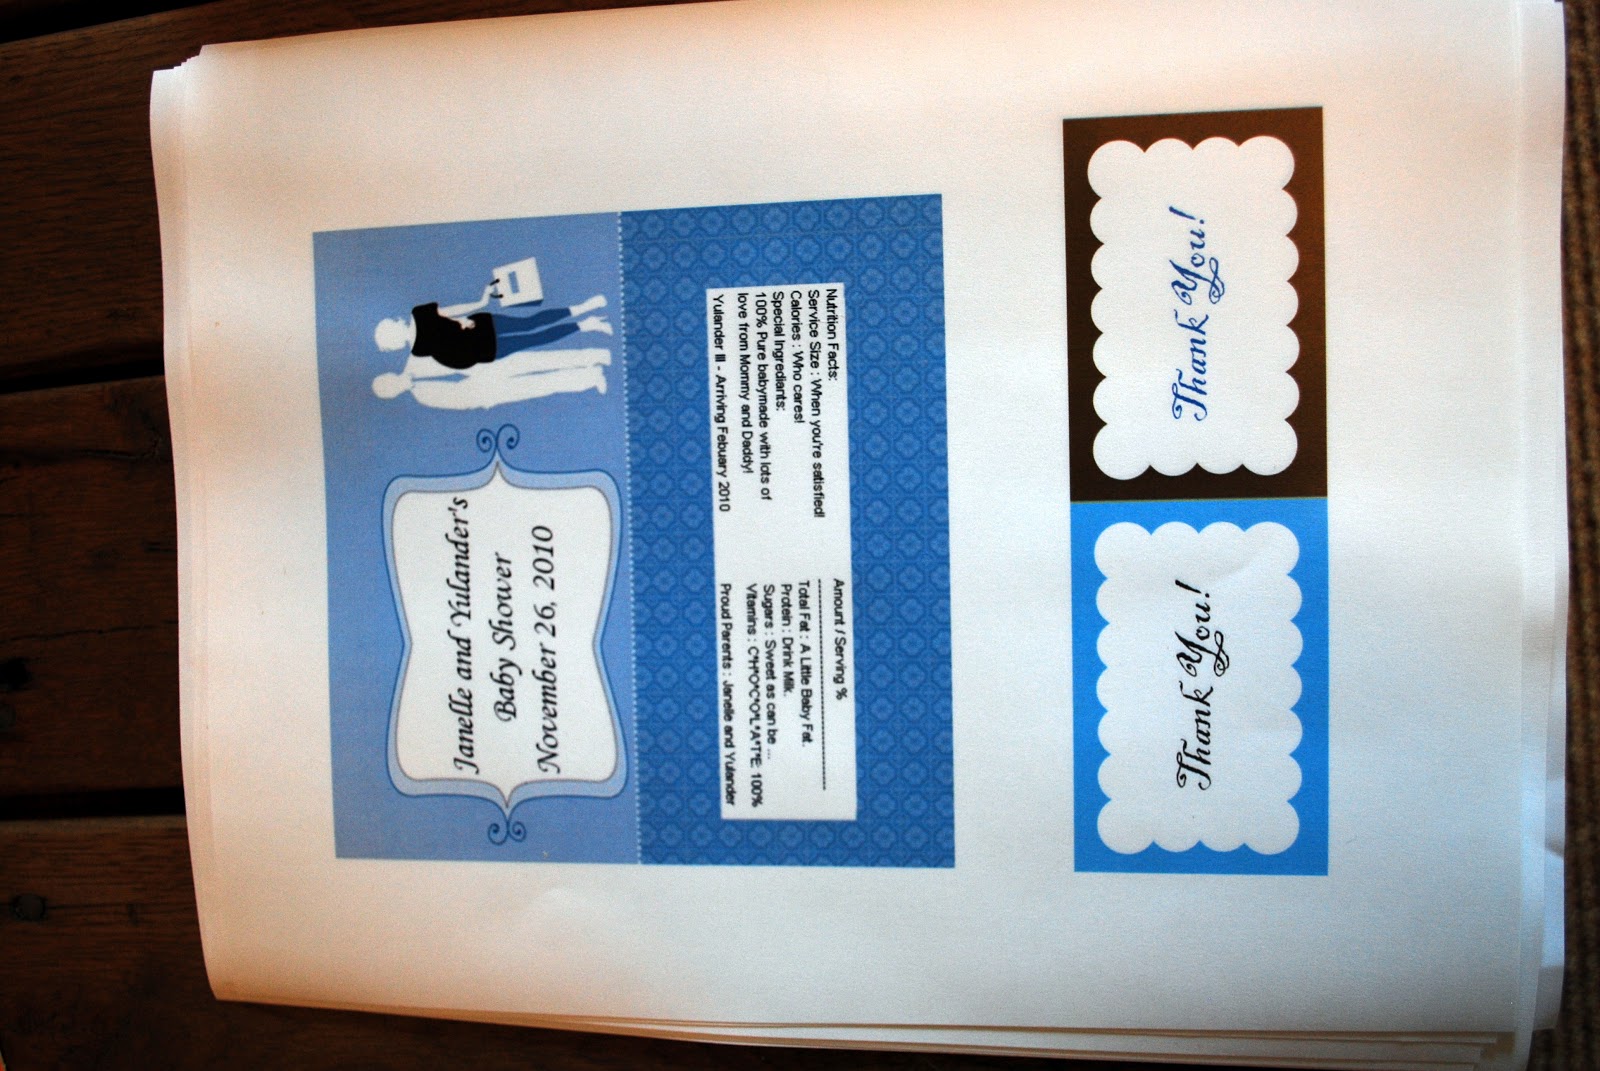
2. Mess around in paint / word / picasa / photoshop ... whatever your editing method of choice is and come up with a design that you like to go on your wrappers, and then print them out.

3. Cut out your wrapper design.

Hint : For you non-crafty people like me who like to attempt to be crafty, but really have no clue what they're doing, this :

is far superior to this :

Trust me on this one...go spend the money to buy even just a cheap paper cutter. Your patience will thank you. I won't even go into how much time I wasted cutting each paper, piece by piece, before I came to this realization...but it was A.LOT.
4. Fold wrapper at crease between where you want the separation between the front and the back.

5. Put decoupage on the top and top-back portion of your Hershey's bar.

6. Put decoupage on the portion of your wrapper that you want to wrap from the front to the back.

7. Press wrapper down until it stays on its own.

8. Put decoupage on the top of the piece that you just folded over, and then put decoupage on the top of the back design.

9. Press down, connecting back to front, and then decoupage over the whole thing.

10. Let dry, then smile at your cool and somewhat homemade party favor.


11. Repeat THIRTY FIVE more times. Try not to stab yourself in the eye in the process...it might seem like more fun, but it's all really worth it in the end.

Ahhh...finished. Give yourself a pat on the back, you did it!!! Then go work on more baby stuff...
Which will be posted about tomorrow!! Hope everyone's enjoying their Thanksgiving week...two more days!! Today, I'm most thankful to have these DONE!
I could've bought these wrappers online, but it would've cost me somewhere between $30 - $35 for what I wanted just for the wrappers. If I wanted to include the chocolates and have them wrap it for me, it would've been closer to $85-$90. The box of Hersey's bars was about $20...all in all, this project with the materials might have run about $1/bar. $36 vs $90...hmmm...the pain in the rear approach was definitely worth saving the extra $$!
Oh, and p.s. Service size is not a typo...or at least I'm not admitting that it's one after all of this. Chocolate is servicing your belly....that's my story and I'm sticking to it!!

If you enjoyed this post, please leave a comment or subscribe to the feed reader to get future posts delivered to your reader. I've actually done these before, quite a number of years ago, for a baby shower and they were a big hit. I also remember them being a big pain in the rear, so why I opted to do them again, I'm not quite sure.
I do know one thing. I think I've officially mastered, or at least gained quite a bit of experience decoupaging. Yep, you heard me right, decoupaging.
I decoupaged Hershey's Bars. Is that normal? (Am I normal? Well, we all know the answer to that one...so lets just move on to the tutorial...)
1. Go to Sam's or Costco or some other store that sells things in mass quantities and pick up a box of Hershey's Bars.
2. Mess around in paint / word / picasa / photoshop ... whatever your editing method of choice is and come up with a design that you like to go on your wrappers, and then print them out.
3. Cut out your wrapper design.

Hint : For you non-crafty people like me who like to attempt to be crafty, but really have no clue what they're doing, this :

is far superior to this :

Trust me on this one...go spend the money to buy even just a cheap paper cutter. Your patience will thank you. I won't even go into how much time I wasted cutting each paper, piece by piece, before I came to this realization...but it was A.LOT.
4. Fold wrapper at crease between where you want the separation between the front and the back.

5. Put decoupage on the top and top-back portion of your Hershey's bar.

6. Put decoupage on the portion of your wrapper that you want to wrap from the front to the back.

7. Press wrapper down until it stays on its own.

8. Put decoupage on the top of the piece that you just folded over, and then put decoupage on the top of the back design.

9. Press down, connecting back to front, and then decoupage over the whole thing.

10. Let dry, then smile at your cool and somewhat homemade party favor.


11. Repeat THIRTY FIVE more times. Try not to stab yourself in the eye in the process...it might seem like more fun, but it's all really worth it in the end.

Ahhh...finished. Give yourself a pat on the back, you did it!!! Then go work on more baby stuff...
Which will be posted about tomorrow!! Hope everyone's enjoying their Thanksgiving week...two more days!! Today, I'm most thankful to have these DONE!
I could've bought these wrappers online, but it would've cost me somewhere between $30 - $35 for what I wanted just for the wrappers. If I wanted to include the chocolates and have them wrap it for me, it would've been closer to $85-$90. The box of Hersey's bars was about $20...all in all, this project with the materials might have run about $1/bar. $36 vs $90...hmmm...the pain in the rear approach was definitely worth saving the extra $$!
Oh, and p.s. Service size is not a typo...or at least I'm not admitting that it's one after all of this. Chocolate is servicing your belly....that's my story and I'm sticking to it!!

I'm linking to the parties in my sidebar...go see what other pain in the rear projects people are coming up with!
Cute! I did these for a baby shower a few years ago, but I used tape on the back. I was looking at doing these for Kelly's shower in March, so maybe I'll try it your way. See you soon. :)
ReplyDeleteok, hello, super cute! i love this-i've only seen the ones that say here she is, or something that looks like hersheys, so i like this. and what an interesting name of daddy!
ReplyDeleteWow! Love all the baby stuff you've been doing. These chocolate bars look great!
ReplyDeleteLove your blog and these are super cute. I hope you don't mind me proof reading but is the info on the back correct? It states arriving Feb. 2010? You look like a great friend to do all of this for your friend. Lisa
ReplyDeleteHi Kara! I discovered your blog and must say I love your bench with the baskets, your frames with the burlap (an idea that I'm totally thinking of stealing) and so far the blog as a whole! I look forward to coming back. By the way, I'm following you!
ReplyDeleteI'd love for you to check out my blog when you find some time. Have a fab Thanksgiving!
Manymomentsofme.blogspot.com
Aww those are so stinkin' cute! Fabulous job!!
ReplyDeletePersonal wrappers are the best!
ReplyDeleteThese are really, really cute!
ReplyDeleteI did something similar with the Hershey's Nuggets...I taped mine, but never thought about decoupage...maybe next time (we have another grandchild on the way in Jan) I needed a lot for co-workers...but I like the idea of the big bars for the shower.
ReplyDeleteI'm your newest follower...come check out my blog when you get a chance :-)
Shantel @
www.itsapricelesslife.blogspot.com
Such fun ideas--Thanks for linking up to Beyond the Picket Fence's Under $100 Party.
ReplyDeleteThese wrappings are just too cute! When I had my son, I was given a Hershey Bar with a blue wrapper that had a window cut out and above it said, "It's a" and in the window you could see the 'he' of the word Hershey. It's in his baby book now...minus the chocolate! Terry
ReplyDeletecute! And who doesn't love chocolate?!?!?
ReplyDeleteVery Crafty! Who wouldn’t want chocolate party favors? And they make cute baby shower decorating ideas for boys before giving them away when the shower is done. Love it!
ReplyDelete